Concrete floors are the dependable jeans of home design: tough, practical, and not always invited to fancy parties. But with the right prep, the right paint, and a little patience, that dull gray slab can become a clean, stylish, budget-friendly surface that looks intentional instead of “we ran out of flooring money.” Learning how to make a DIY painted concrete floor is one of the smartest upgrades for basements, garages, laundry rooms, workshops, patios, and even modern living spaces.
The good news? You do not need to be a professional contractor to paint concrete successfully. The less glamorous news? You do need to prepare the floor properly. Concrete is porous, dusty, sometimes oily, and occasionally moody. If you rush straight to rolling on paint, the coating may peel, bubble, scratch, or lift like it is trying to escape the room. A beautiful painted concrete floor starts long before the first coat goes down.
This guide walks you through the full process: choosing concrete floor paint, testing for moisture, cleaning, repairing cracks, priming, painting, sealing, and caring for the finish. By the end, your concrete floor will not just be painted. It will be upgraded, protected, and ready for real life.
Why Paint a Concrete Floor?
Painting concrete is one of the most affordable ways to transform a room without installing tile, vinyl, laminate, or carpet. A painted concrete floor can brighten a basement, make a garage feel cleaner, refresh a porch, or turn a utility space into something that no longer looks like a storage dungeon with lighting problems.
Concrete floor paint also helps protect the surface from stains, dust, mild moisture, foot traffic, and everyday wear. In garages and workshops, a durable coating can make cleanup easier. In basements, it can visually warm up the room. On patios or porches, the right exterior-rated coating can add color and personality without calling in a demolition crew.
Before You Start: Know What Kind of Concrete You Have
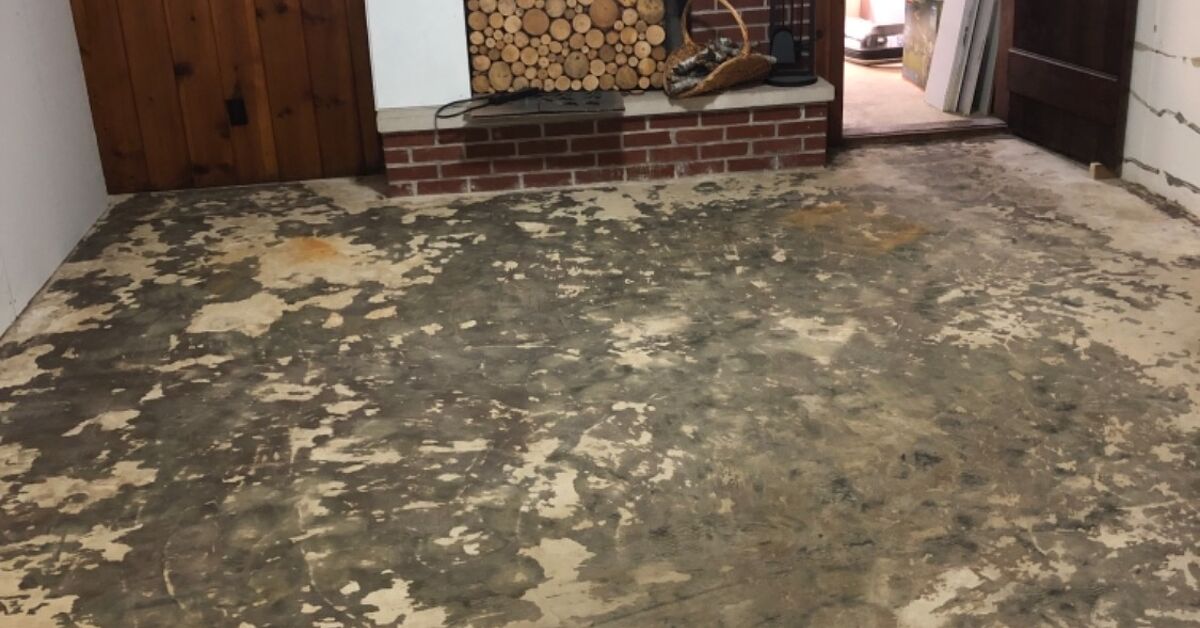
Not all concrete floors are ready for paint. Some are bare and porous. Some are sealed. Some have old paint. Some have mystery stains from 1998. Before buying supplies, inspect the floor carefully.
Do the Water Drop Test
Place a small drop of water on the concrete and wait about a minute. If the water soaks in, the concrete is likely bare and porous enough to accept a coating after proper preparation. If the water beads on top, the floor may already be sealed or coated. Paint will not bond well to a sealed surface unless that sealer is removed or the surface is mechanically prepared.
Check for Moisture Problems
Moisture is the villain in many failed concrete painting projects. Tape a square of clear plastic to the floor for 24 hours. If condensation forms underneath or the concrete darkens, moisture may be moving through the slab. In that case, pause the project and address the moisture issue first. Paint is talented, but it is not a waterproofing miracle worker in a cape.
Look for Damage
Small cracks, shallow chips, and minor pitting can usually be repaired before painting. Wide cracks, crumbling sections, heaving, or ongoing water intrusion may require professional repair. Paint can make a good floor look great, but it cannot turn a failing slab into a structural masterpiece.
Best Paint for a DIY Painted Concrete Floor
The best paint depends on where the floor is located and how much abuse it will take. A basement craft room and a two-car garage have very different lifestyles. One worries about glitter. The other worries about hot tires, oil, tools, and someone dropping a lawn mower part.
1-Part Epoxy Concrete Paint
One-part epoxy acrylic paint is popular for DIY concrete floors because it is easier to apply than a two-part epoxy system. It often cleans up with soap and water, dries reasonably fast, and works well for basements, laundry rooms, patios, porches, and light-use garages. It is a practical choice when you want durability without mixing resin and hardener.
2-Part Epoxy Coating
Two-part epoxy is usually tougher and more chemical-resistant than standard concrete floor paint. It is a strong option for garages, workshops, and high-traffic floors. However, it requires careful mixing, has a limited working time, and demands excellent prep. Once mixed, the clock starts ticking. This is not the moment to answer emails, reorganize the spice drawer, or debate paint colors with three relatives.
Latex Concrete Floor Paint
Latex concrete floor paint can work for lighter-duty areas. It is generally easier to apply and more forgiving, but it may not hold up as well as epoxy in garages or heavy-use spaces. For decorative indoor floors with modest traffic, it can be a budget-friendly option.
Concrete Stain vs. Concrete Paint
Concrete stain penetrates the surface and creates a more translucent, natural finish. Paint sits on top and creates a more opaque, uniform color. If you want bold color, patterns, stencils, or a solid modern look, paint is usually the better choice. If you want a mottled stone-like effect, stain may be worth considering.
Tools and Supplies You Will Need
Gather your supplies before starting. Concrete floor painting moves more smoothly when you are not searching for a roller frame while wearing one glove and a look of regret.
- Concrete cleaner or degreaser
- Stiff-bristle scrub brush or push broom
- Shop vacuum or broom
- Concrete crack filler or patching compound
- Putty knife or trowel
- Concrete etcher or grinder, if needed
- Painter’s tape
- Plastic sheeting or drop cloths
- Concrete bonding primer, if required
- Concrete floor paint or epoxy coating
- Paint tray and tray liners
- Roller frame and extension pole
- 3/8-inch to 1/2-inch nap roller cover
- Angled brush for edges
- Optional clear sealer
- Optional anti-slip additive
- Gloves, safety glasses, and ventilation fan
Step-by-Step: How to Make a DIY Painted Concrete Floor
Step 1: Clear the Room Completely
Remove furniture, rugs, shelves, boxes, bikes, tools, and anything else touching the floor. If something is too large to remove, shift it to one side, paint in sections, and allow proper drying time before moving it back. For the best finish, however, an empty room is ideal.
Also remove dust from baseboards, walls, and nearby surfaces. Dust has a talent for appearing exactly where fresh paint is drying. It is basically glitter’s boring cousin.
Step 2: Sweep and Vacuum Thoroughly
Start with a serious cleaning. Sweep the entire floor, then vacuum edges, corners, cracks, and expansion joints. Loose grit under paint creates bumps and weak spots. If the floor has old adhesive, flaking paint, or loose coating, scrape it away before washing.
Step 3: Degrease the Concrete
Concrete absorbs oil and grime, especially in garages and workshops. Use a concrete-safe degreaser on oily areas and scrub with a stiff brush. Rinse thoroughly according to the product instructions. Any cleaner left behind can interfere with paint adhesion, so do not treat rinsing like a casual suggestion.
For stubborn stains, repeat the degreasing process. If oil continues to rise to the surface, paint may not bond properly. In that situation, more aggressive cleaning or grinding may be necessary.
Step 4: Repair Cracks, Chips, and Pits
After the floor dries, fill cracks and holes with a paintable concrete crack filler or patching compound. Use a putty knife or trowel to smooth the repair so it sits flush with the surrounding floor. For deeper areas, follow the patch product’s instructions; some repairs must be built in layers.
Let all repairs cure completely. Sand or scrape rough patches if needed. The smoother the floor is before painting, the better the final surface will look. Paint highlights texture more than people expect, especially when sunlight hits it at an angle and suddenly your floor has a topographic map.
Step 5: Etch or Grind If the Surface Is Too Smooth
Paint needs a surface it can grip. If your concrete is very smooth, dense, shiny, sealed, or power-troweled, it may need etching or mechanical grinding. Etching opens the pores of bare concrete, while grinding creates a physical profile for coating adhesion.
Use a concrete etching solution only as directed and rinse completely. Never leave residue behind. If the floor is sealed, painted, or heavily contaminated, grinding may be more effective than etching. For large garages or high-performance epoxy systems, renting a concrete grinder may be worth the effort.
Step 6: Let the Floor Dry Completely
This step is boring. It is also essential. Concrete must be dry before primer or paint goes down. Drying time depends on humidity, temperature, airflow, and how much water was used during cleaning. Use fans and ventilation to help, but do not paint damp concrete.
If you are painting new concrete, allow it to cure according to coating manufacturer instructions. Many coating systems require new concrete to cure for weeks before painting. Rushing this stage can trap moisture and lead to blistering or peeling.
Step 7: Tape Edges and Protect Walls
Use painter’s tape along baseboards, walls, steps, posts, and any area you do not want painted. If you are painting a basement or garage, consider running the coating slightly up the bottom edge of the wall or curb for a cleaner, more protected finish. Just keep the line neat unless you are going for “abstract raccoon tracks.”
Step 8: Apply Concrete Primer
Some concrete floor paints are self-priming, while others require a concrete bonding primer. Read the label carefully. If primer is recommended, do not skip it. Primer helps improve adhesion, evens out porosity, and creates a better base for the topcoat.
Cut in around edges with a brush, then roll primer across the floor in manageable sections. Work toward an exit so you do not paint yourself into a corner. This sounds obvious until someone has to tiptoe across wet primer holding a roller and questioning every decision.
Step 9: Apply the First Coat of Concrete Floor Paint
Once the primer is dry, stir the paint thoroughly. Cut in around the perimeter with a brush. Then use a roller on an extension pole to apply the first coat in thin, even passes. Avoid heavy puddles. Thick coats dry unevenly and are more likely to peel.
Maintain a wet edge as you work. Roll in one direction, then lightly back-roll to even out the finish. If using decorative flakes, broadcast them while the coating is still wet, following the product instructions.
Step 10: Add Anti-Slip Texture If Needed
Painted concrete can become slippery, especially on patios, porches, laundry rooms, pool areas, and garages where water may appear. Mix an anti-slip additive into the coating or broadcast it according to the manufacturer’s directions. This small step can make the floor safer without ruining the look.
Step 11: Apply the Second Coat
Most painted concrete floors look and perform better with two coats. Apply the second coat after the recommended recoat time. For a more uniform finish, roll the second coat perpendicular to the first. This helps reduce lap marks and thin spots.
Use good lighting as you work. Concrete paint can look even while wet but reveal missed areas later. A portable work light can help you catch streaks before the paint dries and becomes part of your home’s permanent personality.
Step 12: Let the Floor Cure Before Heavy Use
Dry-to-the-touch time is not the same as full cure time. A floor may feel dry in hours but still need days before it can handle furniture, rugs, tires, or heavy traffic. Follow the coating label exactly. Wait longer in cool or humid conditions.
When moving furniture back, lift instead of dragging. Use felt pads under legs. Avoid rubber-backed rugs unless the paint manufacturer says they are safe, because some rubber materials can react with coatings or trap moisture.
Design Ideas for Painted Concrete Floors
A DIY painted concrete floor does not have to be plain gray, although gray is popular for a reason: it hides dust, looks modern, and rarely argues with the rest of the room. But paint gives you creative freedom.
Solid Color Finish
A single color is the simplest and cleanest approach. Soft gray, warm greige, charcoal, beige, slate blue, and off-white are popular choices. Lighter colors brighten basements and laundry rooms, while darker colors hide dirt in garages and workshops.
Checkerboard Floor
A painted checkerboard adds classic charm to a basement, porch, mudroom, or studio. Use painter’s tape, careful measuring, and a low-tack approach after the base coat cures. Black and white is bold, but tan and cream or gray and white can feel softer.
Stencil Pattern
Stencils can mimic tile for a fraction of the cost. This works especially well in small spaces like laundry rooms, entryways, and covered patios. Choose a pattern scale that fits the room. A tiny pattern in a large basement may look busy; a huge pattern in a small room may look like the floor is yelling.
Painted Rug Effect
Paint a rectangular border or rug-like design in the center of the floor. This is a clever option for patios, sunrooms, and casual living areas where a real rug may trap moisture or dirt.
Common Mistakes to Avoid
Skipping the Moisture Test
Moisture problems are one of the fastest ways to ruin a painted concrete floor. Always test first, especially in basements, garages, and slabs on grade.
Painting Over Dirt or Oil
Paint sticks to whatever is on the surface. If that surface is dust, grease, or old cleaner residue, the paint will eventually lift with it. Cleaning is not the glamorous part, but it is the part that decides whether your floor lasts.
Using Wall Paint
Interior wall paint is not designed for foot traffic. Use paint or coating made specifically for concrete floors. Your floor is not a wall that people walk on politely; it needs a tougher formula.
Applying Paint Too Thick
Thicker is not better. Thin, even coats dry harder and bond better. Heavy coats may stay soft, wrinkle, or peel.
Ignoring Temperature and Humidity
Paint performs best within the temperature and humidity range listed on the label. Cold, damp, or extremely hot conditions can affect drying, curing, and adhesion.
How to Maintain a Painted Concrete Floor
Once the floor cures, maintenance is simple. Sweep or vacuum regularly to remove grit. Mop with a mild cleaner as needed. Avoid harsh solvents unless the coating manufacturer approves them. Clean spills quickly, especially oil, chemicals, and acidic liquids.
Use mats in high-wear areas, but choose breathable mats when possible. In garages, avoid turning tires sharply on fresh coatings until the full cure period has passed. In living spaces, add felt pads under furniture legs to reduce scratching.
If the floor gets chipped, lightly sand the damaged area, clean it, and touch up with leftover paint. Keep a labeled container of the paint color and product name. Future you will be grateful. Future you is always looking for the thing present you forgot to label.
Is a DIY Painted Concrete Floor Worth It?
Yes, if you are realistic about the process. Painting a concrete floor is affordable, customizable, and very satisfying when done correctly. It is especially worth it for basements, garages, utility rooms, porches, patios, studios, and budget remodels.
The key is preparation. A durable painted concrete floor is not the result of magic paint. It is the result of cleaning, repairing, profiling, priming, and respecting cure times. If you do those things well, the finished floor can look fresh, modern, and surprisingly polished.
Extra Experience: What You Learn After Painting a Concrete Floor Yourself
The first thing you learn while painting a concrete floor is that the floor has been quietly collecting evidence for years. Dust, oil spots, mystery paint drips, tiny cracks, old adhesive, pet hair, and one screw you definitely dropped during another project all appear during prep. This is why experienced DIYers spend more time cleaning than painting. The painting part feels fast. The prep part feels like an archaeological dig with a shop vacuum.
One practical lesson is to divide the project into days instead of trying to do everything in one heroic marathon. Day one can be clearing, sweeping, degreasing, and rinsing. Day two can be crack repair and sanding. Day three can be primer. Day four can be paint. This schedule may sound slow, but it lowers stress and gives each stage time to dry or cure. Concrete is patient. You should be patient too, even if the paint roller is whispering, “Let’s just finish this tonight.”
Another lesson is that lighting matters more than expected. A garage or basement can hide roller marks until the coating dries. Use a portable work light and look across the floor from different angles. Wet paint reflects light, so thin patches and puddles are easier to catch while you can still fix them. This is especially helpful when using gray paint on gray concrete, which can feel like painting fog onto a cloudy day.
Color choice also deserves more thought than a quick glance at the paint chip aisle. Very light floors make a basement feel bigger and brighter, but they show dirt faster. Dark floors hide stains but can make a small room feel heavier. Medium gray, warm taupe, soft greige, and muted blue-gray are forgiving choices. If you want a bold color, test it on a small hidden area first. Floors reflect light differently than walls, and a color that looks calm on a card may become “industrial blueberry” across 300 square feet.
Stenciling is another place where experience helps. It looks easy online because the camera skips the part where you crouch like a garden gnome for three hours. If you stencil, use minimal paint on the roller or brush. Too much paint bleeds under the stencil. Tape the stencil securely, work slowly, and keep a small artist’s brush nearby for touch-ups. Slight imperfections are normal and often disappear when you view the whole floor instead of inspecting it from six inches away like a museum conservator.
You also learn not to move furniture back too soon. A floor can feel dry and still be soft underneath. Heavy furniture, tires, or rubber mats can leave marks if the coating has not fully cured. Wait the recommended time, then add protective pads under furniture legs. In garages, give the floor extra time before parking. Hot tires are not gentle guests.
Finally, a painted concrete floor teaches you that budget upgrades can still feel dramatic. The room looks cleaner. The lighting feels better. The floor becomes part of the design instead of something you apologize for when guests walk in. It is not the easiest DIY project, but it is one of the most rewarding because every step changes the space in a visible way. And when someone asks who did the floor, you get to say, with appropriate casual confidence, “Oh, I painted it myself.”
Conclusion
A DIY painted concrete floor is a practical, stylish, and wallet-friendly way to upgrade a hard-working surface. Whether you are refreshing a basement, organizing a garage, brightening a laundry room, or giving a patio a cleaner look, the process is completely manageable when you respect the prep work. Clean the slab thoroughly, test for moisture, repair damage, use the right primer and concrete floor paint, apply thin coats, add slip resistance where needed, and let the finish cure before returning the room to normal use.
The best painted concrete floors are not rushed. They are built layer by layer, starting with a clean and sound surface. Do it right, and your once-dull concrete can become durable, attractive, and surprisingly fun to show off. Concrete may be humble, but with paint, it cleans up nicely.