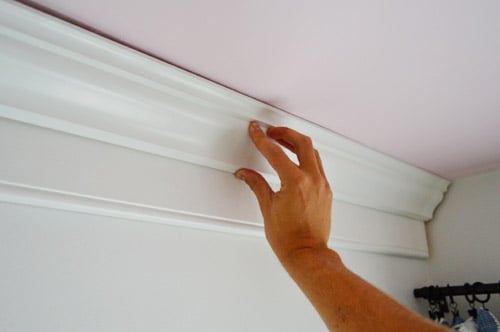
Extra thick crown molding can turn an ordinary room into a space that looks custom-built, thoughtfully proportioned, and just a little more expensive than it really was. The catch? Large crown molding is heavier, harder to support, less forgiving of crooked corners, and fully capable of turning one innocent measuring mistake into an eight-foot piece of decorative firewood.
The installation process is not dramatically different from installing standard crown molding, but the details matter more. You need reliable backing, an accurate layout, properly supported cuts, strong fastening points, and a sensible plan for handling corners. This guide explains how to install extra thick crown molding securely while producing clean joints and a professional-looking finish.
What Counts as Extra Thick Crown Molding?
The term “extra thick crown molding” may refer to a single oversized profile, a solid hardwood molding with substantial depth, or a built-up cornice assembled from several pieces of trim. A large crown may extend six, eight, or even ten inches down the wall, while a layered design can include a frieze board, bed molding, picture molding, cove molding, and the main crown profile.
The visible face width is only part of the equation. You must also consider the crown molding’s wall drop, ceiling projection, material thickness, spring angle, and weight. These measurements determine where the molding will sit, how it must be cut, and whether ordinary stud nailing will provide enough support.
Large molding also magnifies small errors. A slightly inaccurate saw setting that barely shows on narrow trim can create an obvious opening across a wide outside corner. Wider crown therefore demands more careful test cuts, better stock support, and fewer visits to the famous carpentry department known as “we’ll hide it with caulk.”
Tools and Materials You Will Need
Essential tools
- Tape measure and pencil
- Stud finder
- Four-foot level or laser level
- Angle finder or sliding bevel gauge
- Compound miter saw with a fine-tooth blade
- Coping saw, jigsaw, or rotary coping tool
- 15- or 16-gauge finish nailer appropriate for the molding system
- Drill, driver, and countersink bit
- Caulk gun
- Stable ladders or work platforms
- Eye protection and hearing protection
Installation materials
- Extra thick crown molding or components for a built-up profile
- Wood backing strips, triangular nailers, or plywood blocking
- Finish nails of the correct length
- Construction adhesive approved for the molding material
- Wood glue for miters and scarf joints
- Paintable trim caulk
- Wood filler or nail-hole filler
- Primer and trim paint
- Scrap molding for test cuts
Purchase approximately 10 percent more molding than the measured room perimeter. Rooms with bay windows, unusual corners, short returns, or elaborate built-up details may require a larger waste allowance. Longer stock can reduce the number of scarf joints, but only when it can be transported, cut, and lifted safely.
Step 1: Inspect the Room Before Buying Molding
Measure every wall at the height where the crown will be installed. Do not assume opposite walls are equal simply because the floor plan appears rectangular. Houses enjoy expressing themselves through walls that are almostbut not quiteparallel.
Check the ceiling for slopes, waves, drywall buildup, and patched areas. Use an angle finder to measure inside and outside corners rather than assuming they are exactly 90 degrees. Record each measurement and sketch the room, labeling every wall and corner.
Next, compare the proposed crown size with the ceiling height, window trim, door casing, cabinetry, and other architectural features. Extra large crown molding should look substantial without crowding the tops of windows or making a low ceiling feel compressed. A built-up design can often create a grander appearance with less weight than one enormous solid profile.
Step 2: Acclimate, Prime, and Organize the Material
Bring wood or MDF crown molding into the installation area before cutting it. Follow the manufacturer’s acclimation requirements; many molding instructions recommend allowing material to adjust to the room for two or three days. Keep the pieces flat, dry, and supported along their length.
Prime unfinished wood on all accessible faces, including the back when appropriate. Applying the first finish coat before installation can also save considerable ladder time. Leave the final coat until after filling, caulking, and sanding so the completed trim has a continuous finish. Manufacturer guidance commonly recommends prefinishing or priming molding before installation and touching it up afterward.
Inspect each piece for bows, damaged edges, profile inconsistencies, or dents. Reserve the straightest pieces for long, prominent walls. Shorter or slightly imperfect stock can often be used above closets, behind doors, or for small returns.
Step 3: Make a Crown Molding Layout Gauge
Cut a short sample of the actual crown molding and hold it in its intended installed position. Make sure both rear contact surfaces sit correctly against the wall and ceiling. Mark the bottom edge on the wall and the ceiling projection overhead.
Transfer these dimensions to a small plywood or cardboard gauge. Use the gauge around the room to establish consistent layout marks. Connect the wall marks with a laser or chalk line. This line is more dependable than following the ceiling, especially when the ceiling rises or dips slightly.
Do not force the molding to follow every wave in the drywall. A smooth visual line usually looks better than crown molding that wiggles like a garden hose. Minor gaps can be caulked later, while severe variations should be corrected with shims or localized backing adjustments.
Step 4: Install Solid Backing for the Crown
Backing is one of the most important differences between standard and extra thick crown molding. Large crown may not align conveniently with both wall studs and ceiling joists. Even when it does, its hollow rear cavity can make consistent nailing difficult.
A continuous wood nailer gives the molding a solid attachment point anywhere along the wall. Depending on the profile, the backing may be a ripped 2-by board, a triangular strip, beveled plywood, or multiple pieces of dimensional lumber. Its face should match the angle of the crown’s rear cavity without preventing the molding from contacting the wall and ceiling.
How to size the backing
- Hold a crown molding sample in the correct installed position.
- Trace the empty space behind it onto cardboard or scrap wood.
- Design the nailer so it fills enough of that space to receive fasteners.
- Leave clearance for decorative curves and thin portions of the profile.
- Test the backing with a full-size sample before installing it around the room.
Fasten the backing securely to wall studs, ceiling framing, or structural top plates using appropriate screws. Confirm that electrical cables, plumbing, or ductwork are not in the fastener path. Backing strips are widely recommended for supporting crown molding, particularly large profiles and installations where direct framing access is inconsistent.
For built-up crown molding, the first flat board or frieze component may act as both a decorative layer and an installation base. Secure that foundation carefully because every later molding layer depends on it.
Step 5: Create Cutting Templates
Before cutting full-length material, make labeled templates from short scraps. Create samples for:
- Left inside corner
- Right inside corner
- Left outside corner
- Right outside corner
- Scarf joint
- End return
Mark the ceiling edge, wall edge, finished face, and direction of each template. Keep them beside the saw. Crown molding orientation is famously confusing because the material may be cut upside down, backward, or flat with compound settings. Templates reduce the likelihood of producing two beautiful left-hand pieces when you desperately need a right-hand one.
Step 6: Choose a Cutting Method
Nested cutting
With the nested method, place the crown upside down against the miter saw fence. The fence represents the wall, and the saw table represents the ceiling. Hold or clamp the molding at the exact installed spring angle and rotate the miter setting for the required corner.
This technique is intuitive once you understand the orientation, but extra thick crown may be too wide for the saw fence or too unstable without a crown stop. Build a support fence or cutting jig that holds every piece at the same angle.
Cutting crown molding flat
Wide crown is often easier to cut while lying flat on the saw table. This method requires both miter and bevel settings based on the molding’s spring angle and the measured corner angle.
For one common crown configuration installed in a true 90-degree corner, saws often use approximately 31.6 degrees of miter and 33.9 degrees of bevel. Those settings are not universal. Confirm the spring angle, consult the profile manufacturer’s chart, and test the setup on scrap before cutting expensive material.
Support long stock on both sides of the saw so it remains level with the saw bed. Allow the blade to reach full speed, cut steadily, and let it stop before lifting it from the molding. This helps reduce chipped edges and accidental contact with the finished profile.
Step 7: Install the First Piece
Plan the installation order before making production cuts. Begin on a less noticeable wall when possible, but also arrange the sequence so most inside corners require coping on only one end of each piece.
Cut the first piece square so it butts into both inside corners, or create the appropriate outside miter if the room layout requires one. Dry-fit the molding and check its bottom edge against the layout line.
Apply a modest amount of manufacturer-approved adhesive to the backing if the material and installation system permit it. Lift the crown into position with a helper. Fasten through the thick structural areas of the profile and into the backing. Avoid firing nails through fragile beads, narrow decorative edges, or thin hollow sections.
Do not depend on adhesive alone unless the molding manufacturer specifically approves an adhesive-only installation. Extra thick crown molding should have reliable mechanical fastening.
Step 8: Cope Inside Corners
Coped joints generally handle imperfect inside corners better than two simple miters. One piece ends square against the wall. The adjoining piece is cut to reproduce the profile of the first.
- Cut a 45-degree inside miter on the end to be coped.
- Darken the exposed profile edge with a pencil.
- Cut along that profile with a slight back bevel.
- Remove additional material from the rear, not the visible face.
- Test-fit the joint and refine it with a file or sanding block.
Large crown may require relief cuts through thick waste sections before coping the detailed profile. Work patiently and support the material securely. A good cope should contact the adjoining molding along the visible front edge while leaving clearance behind it.
Coping is favored for many inside crown molding corners because it tolerates small variations in the corner angle and is less likely than a simple miter to reveal a seasonal gap.
Step 9: Fit Outside Corners Carefully
Outside corners are usually mitered, and they are much less willing to forgive inaccuracies. Measure the actual corner angle and divide it in half to obtain the starting miter angle for each piece.
Cut the pieces slightly long and test them together at the corner. Adjust the angle in small increments. Focus first on closing the visible bottom and face edges. A tiny opening at the rear is less noticeable and can often be managed when the joint is assembled.
Apply wood glue to the mating surfaces, bring the corner together, and pin or clamp it when practical. For large profiles, assembling and gluing a short outside-corner unit before lifting it into position can be easier than trying to align two heavy pieces overhead.
Where the design ends at an open wall, create a mitered return rather than leaving the profile exposed. Glue the small return piece in place and use pin nails only when they can be driven safely without splitting it.
Step 10: Join Long Runs With Scarf Joints
When one piece cannot span an entire wall, connect two lengths with a scarf joint rather than a square butt joint. Cut matching angled ends so one piece overlaps the other. Position the joint over a stud or solid backing.
Plan the overlap so the joint is less visible from the room’s primary entrance. Apply wood glue, align the face profile, and fasten both pieces securely. A well-made scarf joint creates a longer glue surface and disguises small movement better than a straight seam.
Step 11: Install Built-Up Crown in Layers
Built-up crown molding is often the best way to achieve an extra thick appearance. Instead of wrestling with one giant profile, you install several manageable components that combine into a deep architectural cornice.
Begin with the foundation pieces, such as a ceiling band and wall-mounted frieze board. Check them for level and parallel alignment. Add the main crown molding next, followed by smaller bed, cove, bead, or panel moldings.
Mock up the entire combination on a short plywood panel before buying all the material. This reveals the true proportions, shadow lines, projection, and fastening locations. Layered molding can be customized to match traditional, Craftsman, Colonial, or contemporary interiors, but every component should look intentional rather than like leftover trim wandered onto the ceiling.
Step 12: Fill, Caulk, Sand, and Paint
Set protruding nail heads below the surface. Fill nail holes and wood-to-wood imperfections with a suitable filler. Use paintable trim caulk where the molding meets painted walls and ceilings.
Caulk should finish the installation, not rebuild it. Large corner gaps usually indicate an incorrect angle, inconsistent spring position, or molding that was cut too short. Correct those problems with recutting, shimming, or fitting whenever possible.
Allow the filler and caulk to cure according to their instructions. Sand repaired areas gently, remove dust, spot-prime exposed material, and apply the final coats of trim paint. A satin or semi-gloss finish commonly provides a durable surface while emphasizing the molding’s shadows and details.
Common Extra Thick Crown Molding Mistakes
Skipping the backing
Heavy crown attached mainly to drywall may sag, twist, or pull away. Install solid nailers or a structural foundation first.
Assuming every corner is square
Measure actual angles and use test pieces. Drywall compound can change the effective angle even when the framing was originally square.
Changing the spring angle while cutting
A small change in how the crown rests against the saw fence changes the resulting joint. Use stops, a jig, or flat-cut settings for repeatability.
Following a wavy ceiling
Use a consistent layout line and correct major variations with backing or shims. Do not force the molding into every dip.
Cutting every piece to its final length immediately
Leave pieces slightly long, test-fit them, and trim gradually. You can remove another thirty-second of an inch. Adding it back requires technology not currently sold beside the miter saws.
Trying to lift long, heavy molding alone
Extra thick crown can be awkward and brittle. Use a helper, temporary support blocks, or a crown support device to hold long pieces safely.
Practical Installation Experiences and Jobsite Lessons
A typical extra thick crown molding project becomes easier the moment the installer stops treating it like ordinary lightweight trim. Consider a rectangular dining room fitted with a seven-inch crown profile. The first instinct may be to locate the studs, shoot a few long nails, and move along. During a dry fit, however, the lower edge may align with the studs while the upper fastening area floats several inches away from usable ceiling framing. That discovery is exactly why the backing stage should happen before any full-length crown is cut.
Once a continuous beveled nailer is secured to the framing, the installation changes completely. The crown can be fastened wherever pressure is needed, including beside a stubborn corner or along a bowed section of drywall. The molding becomes easier to align because the installer is no longer searching for a stud while balancing a heavy board overhead. Backing may add an extra step, but it usually removes several later arguments between the molding, the ceiling, and gravity.
Another common lesson appears at the miter saw. A large crown profile can seem perfectly stable while being held against the fence, yet its spring angle may shift slightly as the cut begins. The resulting outside corner looks tight near the ceiling but opens at the bottom. Recutting with a simple crown stop or plywood jig often fixes the problem immediately. The important insight is that repeatability matters as much as the numerical saw angle.
Inside corners provide their own education. Two mitered pieces may look excellent on the workbench but refuse to close against an actual wall. The corner may measure 89 degrees at the bottom and behave differently near the ceiling because of accumulated drywall compound. A coped joint avoids much of that conflict. The square piece establishes the profile, while the coped piece can be adjusted with a file until its visible edge fits tightly.
Long walls also demonstrate why cutting a piece slightly long is useful. A molding section that is roughly one-sixteenth of an inch long can sometimes be flexed gently into place, creating pressure at both ends. A piece that is one-sixteenth short produces a gap that becomes remarkably noticeable once you know it exists. Careful installers therefore sneak up on final dimensions instead of trusting a single tape-measure reading.
Built-up crown offers another practical advantage. In a room with a nine- or ten-foot ceiling, one massive molding may be expensive and difficult to handle. A flat frieze board, a medium crown, and two smaller detail moldings can create an even larger visual effect. The separate layers allow small wall and ceiling irregularities to be corrected gradually. They also create stronger fastening opportunities because each new component can attach to the structural layer installed before it.
The finishing stage teaches perhaps the most humbling lesson: lighting changes everything. A joint that looks flawless in soft afternoon light may reveal a ridge when illuminated by recessed ceiling lights at night. Before applying the final paint, inspect the crown from several directions with the room’s permanent lighting switched on. Sand raised filler, smooth caulk lines, and check scarf joints by sighting along the molding rather than staring directly at them.
Finally, experienced results come from practicing on scrap. A few short test pieces can confirm the spring angle, saw orientation, coping method, outside-corner settings, and backing design. Sacrificing three feet of molding to testing is far cheaper than sacrificing three twelve-foot boards to optimism. Extra thick crown molding rewards patience, and it has a suspiciously accurate method of identifying anyone who tries to rush.
Conclusion
Installing extra thick crown molding successfully depends on preparation more than speed. Measure the room carefully, confirm the molding’s spring angle, install solid backing, create cutting templates, and test every important joint on scrap. Cope inside corners, measure outside corners instead of assuming they are square, and use scarf joints over reliable fastening points.
Large crown molding can be demanding, but it also offers a major visual payoff. With secure support, consistent positioning, accurate cuts, and patient finishing, an oversized or built-up crown can give an ordinary room the depth and character of custom architectural millwork.
Note: Crown molding dimensions, spring angles, approved adhesives, fastener sizes, and installation requirements vary by material and manufacturer. Always follow the instructions supplied with the selected molding and check for concealed wiring, plumbing, and ductwork before drilling or fastening.