Macrame has a slightly unfair reputation. Look at a large, beautifully knotted wall hanging and it seems as though the maker must have attended a secret rope university, graduated with honors, and spent several years apprenticing under a very patient sailor. Fortunately, the truth is considerably less dramatic.
A macrame wall-hanging for beginners can be made with a wooden dowel, cotton cord, scissors, a measuring tape, and just a handful of basic knots. You do not need a loom, sewing machine, expensive tools, or supernatural control over string. Once you understand how a few knots work, the apparently complicated patterns become combinations of surprisingly simple movements.
This guide walks through the entire process, from choosing macrame cord and estimating length to tying the essential knots, creating a beginner-friendly wall hanging, correcting common mistakes, and finishing the fringe. There is also an extended section at the end covering practical lessons and experiences that can make your first macrame project much less frustrating.
What Is Macrame?
Macrame is a textile technique in which cord, rope, string, or similar fibers are tied into decorative knots. Unlike traditional weaving, macrame generally does not require a loom. Your hands do most of the work.
The technique can be used to create plant hangers, bags, table runners, jewelry, curtains, decorative leaves, and other fiber art, but DIY macrame wall hangings are particularly popular because they combine texture and pattern without requiring complicated equipment.
A wall hanging normally begins with cords attached to a support such as a wooden dowel, branch, metal hoop, or another sturdy horizontal element. The cords are then divided and recombined as different knots are worked downward.
The secret is repetition. A wall hanging that appears to contain a hundred mysterious techniques might actually rely heavily on only three or four knots.
Why Macrame Is a Good Craft for Beginners
Macrame has one major advantage over many crafts: mistakes are usually reversible. Tie something incorrectly and, in most cases, you can loosen the knot and try again. Your cord may become mildly annoyed, but it will recover.
It is also relatively inexpensive to begin. A small project needs only a few basic supplies, while wooden dowels and natural branches can provide economical mounting options.
Beginners can also scale projects easily. Instead of beginning with a six-foot masterpiece destined for a hotel lobby, you can practice the same techniques on a piece 12 to 18 inches wide.
Supplies for a Beginner Macrame Wall Hanging
Macrame Cord
Cotton is one of the easiest fibers for beginner macrame projects because it feels comfortable in the hands, forms visible knots, and creates attractive fringe.
For your first wall hanging, cord around 3 to 5 millimeters thick is a practical choice. It is large enough that you can clearly see the knot structure without producing a piece so chunky that every knot resembles nautical equipment.
You will commonly encounter three types of macrame cord:
- Braided cord: Durable, stable, and resistant to unraveling. It is forgiving when knots have to be undone.
- Three-ply rope: Three sections are twisted together. It is versatile and gives finished pieces a traditional rope texture.
- Single-twist cord: Soft and easy to brush into fluffy fringe, although it can unravel more quickly while you work.
For an uncomplicated first project, braided cotton or three-ply cotton cord is usually easier to manage.
A Wooden Dowel or Branch
A smooth wooden dowel approximately 12 to 18 inches long works well for a small beginner project. A clean natural branch can create a more rustic or bohemian appearance.
If you use a branch, make sure it is completely dry, reasonably straight, and free from loose bark, dirt, insects, or sharp areas that might damage the cord.
Sharp Scissors
Macrame involves more cutting than beginners expect. Sharp craft or fabric scissors produce cleaner cord ends and make trimming fringe considerably easier.
Measuring Tape
Guessing cord length works beautifully until it does not. A measuring tape helps keep strands consistent and reduces the possibility of reaching the final row with one cord six inches shorter than its neighbors.
Optional Supplies
You may also find these useful:
- Painter’s tape
- S-hooks
- A clothing rack or garment rail
- A wide-tooth comb
- Wooden beads
- A pet brush or fine comb for fringe
Working with the project hanging vertically is often easier than knotting it flat on a table because gravity keeps the cords organized and lets you judge tension and symmetry more accurately.
How Much Macrame Cord Do You Need?
Cord calculation is one of the first mysteries every beginner encounters. Unfortunately, there is no universal number because different knots consume different amounts of cord.
A strand that mostly hangs vertically requires much less material than a working strand constantly traveling around neighboring cords.
For beginner projects, it is safer to cut generously. Cord can always be trimmed at the end. Adding six missing inches to the middle of an existing cord is significantly less elegant.
A useful planning approach is to make your cut cords several times longer than the intended finished knotting area. Dense square knots and spirals require substantially more cord than sections containing loose, straight strands.
Also remember that cords attached with a lark’s head knot are normally folded in half. A 10-foot piece therefore begins as two working strands approximately 5 feet long.
Four Basic Macrame Knots Beginners Should Learn
1. Lark’s Head Knot
The lark’s head knot is commonly used to attach cord to your dowel.
- Fold one cord exactly in half.
- Place the folded loop behind or over the dowel.
- Bring the two loose ends through the loop.
- Pull downward until the knot sits neatly against the dowel.
Congratulations. You have officially started macrame and nothing has exploded.
2. Square Knot
The square knot is the workhorse of beginner macrame. It is usually worked with four cords: two working cords on the outside and two filler cords in the center.
Bring the left cord across the two center cords, creating a loop. Pass the right cord over the left tail, behind the center cords, and through the loop. Tighten evenly.
Then reverse the process from the other side. Completing both halves forms one square knot.
Repeated square knots produce attractive vertical columns. Alternating groups of square knots can create mesh, diamonds, and geometric patterns.
3. Half Knot and Spiral Knot
A spiral is created when you repeatedly make only the same half of a square knot rather than alternating sides.
As the knots accumulate, the cord naturally twists. There is no need to wrestle it into a spiral; the pattern does the spinning for you.
This is an excellent technique for adding movement to an otherwise symmetrical wall hanging.
4. Double Half Hitch
The double half hitch is useful for producing horizontal, diagonal, and curved lines.
One cord acts as a holding or filler cord while neighboring working cords are tied around it. Changing the angle of the holding cord changes the direction of the completed line.
This knot is particularly helpful for creating chevrons, V shapes, diamonds, and borders.
Step-by-Step Macrame Wall Hanging for Beginners
The following design is intentionally flexible. Exact measurements are less important than understanding the construction.
Step 1: Prepare Your Workspace
Hang your dowel securely from hooks, S-hooks, or a work rack so it sits approximately at chest height. You want the project stable enough that it does not perform a small dance every time you tighten a knot.
Good lighting matters. Light-colored cord against a darker background can also make individual strands easier to distinguish.
Step 2: Cut Your Cord
For a small wall hanging, cut 10 to 12 equal pieces of cotton cord. Beginners should leave extra length rather than trying to calculate every inch perfectly.
Keep cords organized as you cut them. Long pieces of cotton cord possess a remarkable ability to become emotionally attached to one another within seconds.
Step 3: Attach the Cords
Fold each strand in half and attach it to the dowel with a lark’s head knot.
Space the knots evenly across the center of the dowel. Step back occasionally and check the width rather than trusting your view from six inches away.
Step 4: Make the First Row of Square Knots
Divide your cords into groups of four.
Tie one square knot with each group, keeping all knots at approximately the same height. Avoid pulling excessively hard. A neat macrame knot should be secure, not attempting to strangle the dowel.
Step 5: Create Alternating Square Knots
For the next row, leave the outer two cords temporarily unused. Take two cords from one previous knot and two cords from the neighboring knot to form a new group of four.
Tie square knots across the row.
This simple change produces an interconnected diamond or mesh effect and immediately makes the design appear more complex.
Step 6: Add a Central Feature
Continue with alternating square knots or introduce diagonal double half hitch knots that travel toward the center.
Another beginner-friendly option is to create short spiral sections on the left and right sides while leaving the center more open.
Symmetry is helpful when learning because the second half of the design gives you a built-in reference for checking the first.
Step 7: Leave Some Negative Space
A frequent beginner instinct is to knot every available inch. Resist it.
Open cord sections provide contrast and make detailed knots stand out. A successful macrame wall hanging uses empty space almost like a graphic designer uses white space.
Step 8: Finish With a Final Row
Add a horizontal row of square knots near the bottom or form a shallow V shape using double half hitch knots.
Check the hanging from several feet away before finishing. Small irregularities that seem disastrous while your nose is nearly touching the cord may be invisible from normal viewing distance.
Step 9: Create the Fringe
Leave several inches of cord below the final knots.
If you want smooth fringe, untwist the fibers and comb them gently from the bottom upward. Hold the cord above the area being brushed to avoid pulling aggressively on your knots.
Let the fibers relax before the final trim.
Step 10: Trim the Bottom
You can cut the fringe into several shapes:
- Straight horizontal line
- Soft V shape
- Deep V shape
- Rounded curve
- Asymmetrical angle
- Natural uneven fringe
Hang the project normally while evaluating the final length. Gravity can change how fringe falls, so trimming it completely flat on a table may produce surprises once it returns to the wall.
Common Beginner Macrame Mistakes
Cutting Cord Too Short
This is probably the most painful mistake because cord disappears surprisingly quickly inside dense knots.
Whenever uncertain, add extra length. The leftover cord can become fringe, tassels, practice knots, or future small projects.
Using Inconsistent Tension
Two identical knots can look noticeably different if one is extremely tight and the other loose.
Focus on repeatable tension rather than maximum tightness. Your hands gradually learn how much force feels right.
Ignoring Cord Direction
Twisted filler cords can make otherwise clean square knots look untidy. Pause occasionally and straighten the strands before continuing.
Starting Too Large
An enormous first project means more cord, more knots, more opportunities for measurement errors, and much more material to unknot when something goes wrong.
A small project teaches exactly the same basic skills with significantly lower emotional investment.
Trimming Fringe Too Early
Finish your knots, hang the project, straighten the fibers, and inspect the silhouette before making the final dramatic haircut.
Scissors are confident little tools. Unfortunately, they do not have an Undo button.
How to Customize Your First Macrame Wall Hanging
Once you understand the construction, there is no reason every project must be cream-colored cord hanging from a pale wooden stick.
Try combining natural and colored fibers. Add wooden beads between knot sections. Use a weathered branch instead of a dowel. Create extra-long fringe or intentionally uneven sections.
You can also vary cord thickness. Thick cord creates bold knots, while thinner cord supports more detailed patterns. Mixing materials adds even more visual texture, although beginners may find it easier to learn with one consistent cord first.
How to Hang and Care for Macrame Wall Art
Attach a separate hanging cord to both ends of the dowel and place it over a securely installed wall hook appropriate for the weight of the piece.
Small macrame wall hangings are generally lightweight, but large designs containing thick rope, wood, beads, or additional decorations can become surprisingly heavy.
For routine cleaning, gentle dusting is usually preferable to aggressive washing. Follow the care recommendations for the exact fiber you purchased. Cotton, synthetic fibers, dyed cord, and mixed materials may react differently to moisture and cleaning products.
Fringe can occasionally be straightened with your fingers or a comb. Work gently to avoid separating areas you want to remain twisted.
Practical Experiences and Lessons From Making Beginner Macrame Wall Hangings
The instructions for macrame are simple enough to fit on a page. The experience of actually working with several yards of cord teaches a few additional lessons that diagrams rarely communicate.
Your First Knots Probably Will Not Match
One of the most useful things a beginner can accept is that the first several square knots may look like distant relatives rather than identical siblings.
This usually comes from tension rather than incorrect technique. Your left hand may naturally pull harder than your right, or you may gradually tighten knots more aggressively as you become comfortable.
Practice a row of square knots on scrap cord before beginning the final piece. After perhaps 10 or 20 knots, your hands often settle into a rhythm. Macrame is partly muscle memory, and that memory needs a short introduction.
Cutting and Organizing Cord Can Take Longer Than Expected
The glamorous image of macrame involves beautifully moving hands and artistic knots. Reality sometimes involves sitting on the floor surrounded by 150 feet of cotton rope while wondering how three perfectly separate strands became one highly motivated knot.
Measure in an open area. Cut one reference piece first and use it to measure additional strands if they are all identical lengths. Coil or bundle finished pieces loosely so they remain separated until attachment.
Once the cords are on your dowel, comb through the hanging strands with your fingers before beginning each major section.
Work Vertically When Possible
A vertically suspended project gives instant visual feedback. You can see whether rows are level, whether the center is shifting, and whether one side is noticeably tighter.
It is also easier on the cord because gravity naturally separates strands.
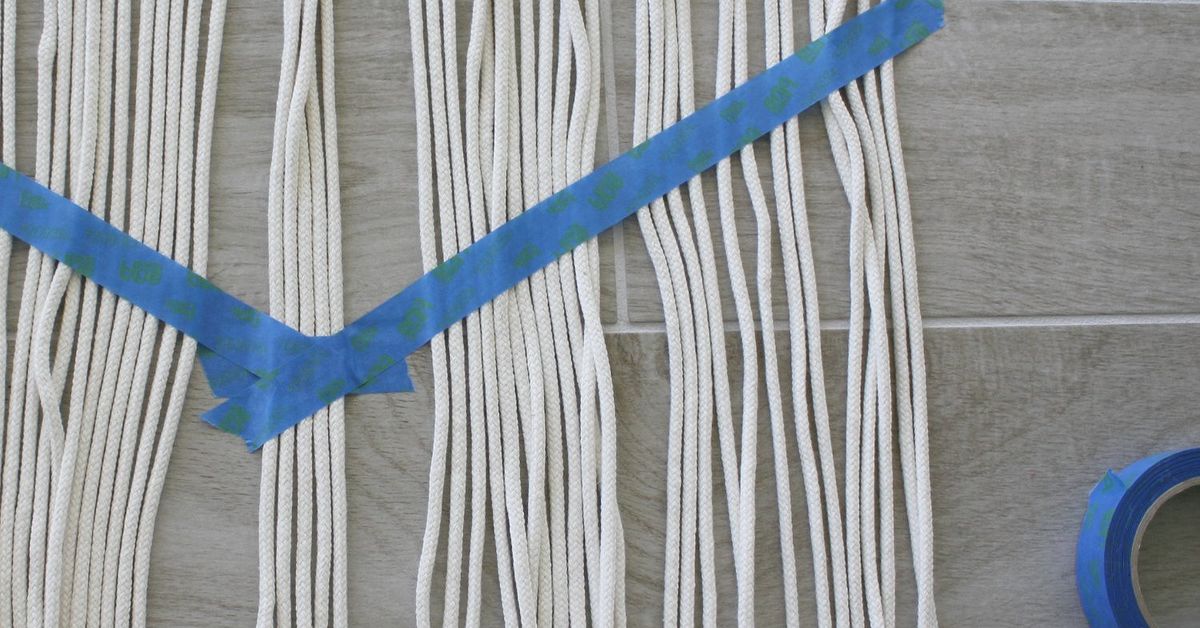
If you work on a table, secure the dowel firmly with tape. Otherwise, every energetic square knot may pull the entire project several inches toward you.
Step Back Frequently
Close inspection is essential while forming knots, but distance is essential while designing.
Every few rows, move several feet away. Look at the overall outline, central alignment, negative space, and visual balance.
Macrame is wall art. The final audience will normally view it from across the room, not under laboratory magnification.
Mark Important Heights
If you are trying to maintain symmetry, place small removable pieces of painter’s tape on filler cords or use a measuring tape to check where major rows begin.
Measuring becomes especially valuable when creating matching spiral sections on opposite sides. Counting knots is another dependable technique. If the left spiral contains 12 half knots, make 12 on the right rather than trying to judge length visually.
Do Not Overtighten Every Knot
Beginners sometimes assume tight equals professional. It does not.
Extremely tight knots become difficult to reposition, can distort neighboring strands, and make later corrections unpleasant. The goal is controlled, even tension.
Imagine shaking hands with someone you like. Firm enough to be secure; not so firm that they reconsider the friendship.
Undo Mistakes Early
When you notice an incorrect cord or backward knot, correct it immediately.
Continuing for another five rows because you hope the mistake will somehow become an artistic decision usually produces significantly more untying later.
A blunt tapestry needle, crochet hook, or similar non-sharp tool can help loosen stubborn knots without aggressively pulling fibers apart.
Buy More Cord Than Your Perfect Calculation Says
Even carefully calculated projects can consume extra cord because your tension, knot density, fringe length, or design may change while working.
Having additional cord from the same batch is useful, particularly when color consistency matters.
Extra pieces are rarely wasted. They can be turned into keychains, tassels, ornaments, practice samples, gift wrapping, or tiny wall decorations.
Let the First Project Be a First Project
Perhaps the most valuable lesson is not to compare your first wall hanging with the elaborate work of an artist who has tied thousands of knots.
Your initial project is supposed to teach you where cords travel, how knots tighten, how patterns develop, and how fiber behaves. A slightly crooked row is evidence that you actually made something rather than evidence that you failed.
By the second project, your measurements improve. By the third, your square knots become more uniform. Soon you will look at complicated designs and recognize individual knot families instead of seeing an intimidating jungle of rope.
Conclusion: Start Simple and Keep Knotting
Learning how to make a macrame wall hanging is less complicated than the finished artwork suggests. Start with manageable cotton cord, a sturdy dowel, sharp scissors, and basic knots such as the lark’s head, square knot, spiral knot, and double half hitch.
Concentrate first on even tension and clean repetition. Once those skills become comfortable, experiment with diamonds, chevrons, beads, contrasting colors, unusual branches, layered fringe, and larger designs.
The beauty of macrame wall-hanging for beginners is that there is no requirement for perfection. Handmade fiber art gains much of its appeal from texture, variation, and personality. Your first piece may contain a crooked knot or two. Hang it anyway. From six feet away, visitors will see handmade wall art. Only you will remember the 17-minute argument you had with cord number seven.
Note: This tutorial is intended as a practical beginner guide. Cord requirements, dimensions, cleaning methods, and finished results can vary according to fiber type, knot tension, cord thickness, and individual design choices.