If your Minecraft sword has more enchantments than your backpack has snacks, sooner or later you are going to need an anvil. The anvil is one of those blocks that looks simple, sounds heavy, and quietly becomes the hero of your survival world. It repairs enchanted gear, combines enchantments, renames items, works with name tags, and, if gravity gets involved, can ruin someone’s day in a very cartoonish way.
In this guide, you will learn exactly how to craft an anvil in Minecraft in four easy steps. We will cover the materials, the crafting recipe, how much iron you really need, how to use an anvil properly, and a few practical tips that can save you levels, resources, and mild keyboard-smashing frustration.
The short version: to craft an anvil, you need 3 blocks of iron and 4 iron ingots. Since each iron block requires 9 iron ingots, the real cost is 31 iron ingots total. That is not pocket change in the early game, but for long-term survival, it is absolutely worth the grind.
What Is an Anvil in Minecraft?
An anvil is a utility block used to repair items, combine enchanted gear, apply enchanted books, rename items, and rename name tags. It is not just a fancy chunk of metal for decoration, although it does look excellent in a blacksmith build next to lava, chains, and dramatic lighting.
Unlike a grindstone, an anvil can preserve enchantments while repairing or combining items. That makes it especially important once you start collecting serious gear, such as an Efficiency V pickaxe, a Sharpness sword, a Fortune tool, or armor you have lovingly upgraded like it is a family heirloom.
The anvil is also affected by gravity. If the block under it is removed, it falls like sand or gravel. A falling anvil can damage mobs and players below it, and yes, that means Minecraft lets you build cartoon trap logic into your base. The anvil itself can also become damaged from use or falling, eventually progressing from a regular anvil to a chipped anvil, then a damaged anvil, and finally breaking.
Materials Needed to Craft an Anvil
Before you open the crafting table and stare at the grid like it owes you money, gather these materials:
- 3 blocks of iron
- 4 iron ingots
- 1 crafting table
- A furnace or blast furnace if you still need to smelt raw iron
- Fuel, such as coal, charcoal, or another smelting fuel
The important number is 31 iron ingots. You will use 27 ingots to craft 3 iron blocks, then keep 4 ingots for the anvil recipe itself.
Iron Breakdown
| Item | Quantity Needed | Iron Cost |
|---|---|---|
| Iron Block | 3 | 27 iron ingots total |
| Iron Ingot | 4 | 4 iron ingots |
| Total | 1 anvil | 31 iron ingots |
For new players, this is the part that causes confusion. The recipe does not require 7 iron ingots. It requires 3 iron blocks and 4 ingots. Those iron blocks are expensive little rectangles of ambition.
How to Craft an Anvil in Minecraft: 4 Steps
Now let’s get to the good part. Here is the complete anvil crafting process in four clean steps.
Step 1: Mine or Collect Enough Iron
First, collect enough raw iron to make 31 iron ingots. You can mine iron ore underground, find raw iron in caves, or collect iron from loot depending on your world and play style. If you already have an iron farm, congratulations, you are living the luxury villager-industrial lifestyle. The rest of us are still in caves listening for skeleton footsteps.
Use a stone pickaxe or better to mine iron ore. Once you have the raw iron, smelt it in a furnace or blast furnace. A blast furnace is faster for ores, but a regular furnace works perfectly fine. Add fuel, place the raw iron in the input slot, and wait until you have 31 iron ingots.
If you are early in survival mode, consider mining more than 31 ingots. An anvil is useful, but iron is also needed for tools, armor, shields, buckets, hoppers, rails, and many other survival essentials. Minecraft has a way of making you think, “I have plenty of iron,” approximately twelve seconds before you do not.
Step 2: Craft 3 Blocks of Iron
Next, turn 27 of your iron ingots into 3 blocks of iron. Open your crafting table and fill all 9 slots with iron ingots to create 1 iron block. Repeat this process three times.
After this step, your inventory should contain:
- 3 blocks of iron
- 4 leftover iron ingots
If you accidentally convert all 31 ingots into iron blocks, do not panic. You can place an iron block back into the crafting grid to convert it into 9 iron ingots again. Minecraft forgives this mistake. Creepers do not forgive anything, but Minecraft crafting does.
Step 3: Place the Materials in the Crafting Table
Open your crafting table. You need the full 3×3 crafting grid, so the small 2×2 inventory crafting area will not work.
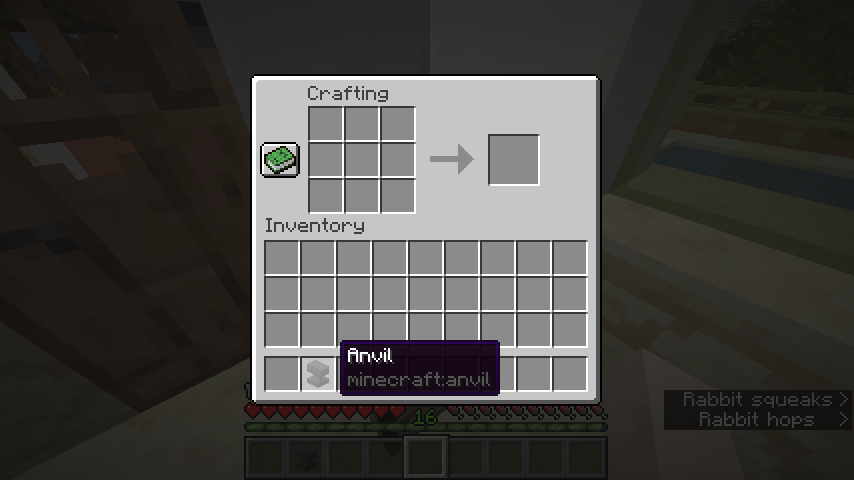
Place the items in this exact pattern:
| Iron Block | Iron Block | Iron Block |
| Empty | Iron Ingot | Empty |
| Iron Ingot | Iron Ingot | Iron Ingot |
Think of the shape as a chunky metal letter “T” with a big iron hat. The three iron blocks go across the top row. One iron ingot goes in the center slot. The final three iron ingots fill the bottom row.
Step 4: Move the Anvil to Your Inventory
Once the recipe is correct, the anvil will appear in the result slot. Drag it into your inventory, and you are done. You have officially crafted an anvil in Minecraft.
Place it somewhere convenient, preferably near your enchanting table, storage area, grindstone, smithing table, or XP farm. You will use it more often than you expect, especially once enchanted books start piling up like homework you forgot to do.
How to Use an Anvil in Minecraft
Crafting the anvil is only half the fun. The real value comes from using it wisely. Anvils cost experience levels for most operations, so it is worth understanding what they do before spending levels like a billionaire at a diamond auction.
Repairing Tools, Weapons, and Armor
You can use an anvil to repair many damaged items. Place the damaged item in the first slot, then place the repair material or a matching item in the second slot. For example, an iron pickaxe can be repaired with iron ingots, while a diamond sword can be repaired with diamonds.
Anvils are especially useful for enchanted items because repairs can preserve enchantments. If your pickaxe has Fortune III, Unbreaking III, and Efficiency V, you probably do not want to toss it into a crafting grid like yesterday’s wooden shovel. Use an anvil instead.
Combining Enchantments
Anvils let you combine two compatible enchanted items or apply an enchanted book to an item. This is how players build powerful tools and armor sets. For example, you can combine an enchanted book with a sword to add Sharpness, or apply Mending to a pickaxe if you have the book.
You can also combine two lower-level enchantments into a higher-level one when the enchantments match. Two Unbreaking II books can become one Unbreaking III book. Two Protection III books can become Protection IV. This is one of the reasons anvils become essential once you start building endgame gear.
Renaming Items
Renaming items is one of the simplest anvil features, and it usually costs experience. You can rename swords, pickaxes, armor, bows, crossbows, fishing rods, shulker boxes, and many other items. This is not just cosmetic. Renaming can help you organize gear, label storage, or give your favorite sword a dramatic name like “Creeper Negotiator.”
Name tags must also be renamed in an anvil before they can be used on mobs. Want a cow named Professor Mooington? The anvil is your paperwork department.
Important Anvil Mechanics You Should Know
Anvils are powerful, but they are not magic vending machines. They have rules, costs, and limits. Learning these mechanics can prevent expensive mistakes.
Anvils Cost Experience Levels
Most anvil operations require XP levels. Repairing, combining enchantments, applying books, and renaming items all typically cost levels. The cost depends on the item, enchantments, repair material, and previous anvil work done on that item.
This is why an XP farm pairs so well with an enchanting setup. Without a reliable XP source, your anvil may sit there looking useful while you wander around punching zombies for spare levels.
The “Too Expensive” Message
If you use an anvil on the same item too many times, the cost can rise until the game says “Too Expensive.” This happens because repeated anvil work increases the prior work penalty. In simple terms, the more often you modify the same item, the more expensive future changes become.
To avoid this, plan your enchantments before applying them. Instead of adding one book at a time in random order, combine books strategically and apply them in fewer operations. This is especially important for high-value gear like netherite armor, swords, bows, and pickaxes.
Anvils Can Break
Anvils do not last forever. With use, they can become chipped, then damaged, and eventually break. They can also take damage when falling from a height. Because crafting one costs 31 iron ingots, it is smart to keep spare iron around or build an iron farm if you use anvils heavily.
Best Tips for Crafting and Using an Anvil
Build Your Anvil Near Your Enchanting Area
The best place for an anvil is near your enchanting table, bookshelves, grindstone, and storage. This creates a compact upgrade station where you can enchant, combine books, repair gear, and rename items without sprinting across your base like you are late for a villager meeting.
Do Not Waste Anvil Repairs on Cheap Gear
If an item has no enchantments, repairing it with an anvil is often not worth the XP or materials. It may be cheaper to craft a new one. Save anvil repairs for enchanted or valuable gear.
Use Mending When Possible
The Mending enchantment can reduce your dependence on anvil repairs. When an item with Mending is held or equipped, experience orbs can repair it instead of adding to your XP bar. This makes Mending one of the most useful enchantments in the game, especially for tools and armor you use constantly.
Try Both Item Orders
When combining items or books, the XP cost can sometimes differ depending on which item goes in the first slot and which goes in the second. Before committing, try swapping the order. If one arrangement is cheaper, use that one. Your XP bar will thank you with quiet pixelated gratitude.
Common Mistakes When Making an Anvil
Using Only Iron Ingots
The recipe needs both iron blocks and iron ingots. If you fill the whole grid with ingots, you will not get an anvil. You will get confusion, followed by a search engine query typed with mild betrayal.
Forgetting the Crafting Table
Anvils require a 3×3 crafting grid. The 2×2 inventory grid is too small. If you cannot see enough slots, craft or place a crafting table first.
Spending Iron Too Early
In early survival, 31 iron ingots is a lot. Make sure you already have basic tools, armor, a shield, and a bucket before spending nearly half a stack of iron on an anvil. The anvil is powerful, but it will not protect you from a skeleton ambush unless you drop it from the ceiling with suspiciously good timing.
Player Experience: What Crafting an Anvil Teaches You
The first time you craft an anvil in Minecraft, it feels like a milestone. It is not as flashy as finding diamonds or entering the Nether, but it changes how you treat your gear. Before the anvil, tools are temporary. You make them, use them, break them, and move on. After the anvil, tools start to have history.
Maybe you have a pickaxe that dug your first diamond vein. Maybe your sword survived a terrible cave fight where three skeletons, two zombies, and one extremely rude baby zombie all showed up like they had been invited. Maybe your bow has Power IV and Punch II, and you have become emotionally attached to launching creepers backward with unnecessary confidence. The anvil lets you keep those items alive longer.
One practical lesson from using anvils is that planning matters. When you first discover enchanted books, it is tempting to slap every book onto your favorite item immediately. Efficiency? Add it. Fortune? Add it. Unbreaking? Add it. A random Curse of Vanishing book? Maybe not that one, unless you enjoy chaos. But after a while, you learn that anvil costs rise. The game rewards players who combine enchantments carefully instead of throwing books into the anvil like confetti.
Another experience is learning the value of iron. New players often underestimate the real cost of an anvil because the recipe visually looks small. Three blocks on top, four ingots around the bottom and middle; how bad could it be? Then you remember each iron block is 9 ingots, and suddenly the anvil is less “quick craft” and more “small mortgage.” That cost encourages better resource habits. You start mining larger iron veins, saving extra ingots, and eventually considering an iron farm if you play long enough.
Anvils also create some of the most satisfying little role-playing moments in the game. Renaming a sword gives it personality. Renaming a name tag turns a random sheep into Sir Wooliam. Labeling a shulker box “Redstone Mess” may not solve your storage problem, but at least it admits the truth. These small details make a survival world feel more personal.
And then there is the comedy of falling anvils. Most players eventually test it. You place an anvil above something, break the support block, and watch gravity do the rest. It is dramatic, loud, and slightly ridiculous. It also reminds you that Minecraft is at its best when useful systems double as sources of mischief.
In the end, crafting an anvil is more than unlocking a recipe. It is the moment your world starts moving from basic survival into real progression. You are no longer just replacing gear. You are improving it, naming it, repairing it, and building a toolkit that can carry you through caves, raids, Nether fortresses, ancient cities, and whatever unfortunate hole you accidentally dig straight into next.
Conclusion
Learning how to craft an anvil in Minecraft is simple once you understand the recipe: gather 31 iron ingots, turn 27 into 3 iron blocks, keep 4 ingots aside, and arrange them in the crafting table with iron blocks across the top, one ingot in the center, and three ingots along the bottom row.
The anvil is expensive for early survival, but it earns its price quickly. It repairs valuable enchanted gear, combines enchantments, applies enchanted books, renames items, and helps you build equipment that lasts. Use it carefully, plan your enchantments, watch your XP costs, and keep extra iron ready for the day your trusty anvil finally cracks under the pressure of being useful.
Once you craft your first anvil, your Minecraft world becomes a little more organized, a little more powerful, and a lot more personal. Also, potentially more dangerous from above. Please look up.