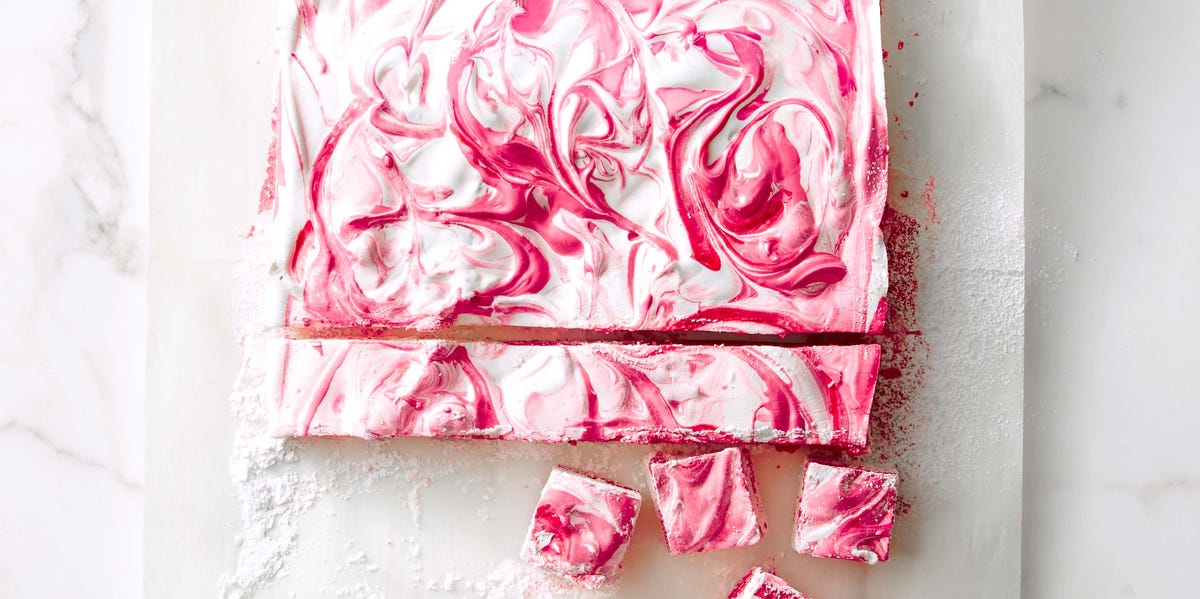
If you have only ever met marshmallows through a plastic grocery-store bag, prepare for a delightful identity crisis. Homemade marshmallows are softer, fluffier, more flavorful, and dramatically more charming. They taste like vanilla clouds that went to finishing school. They melt better in hot chocolate, toast beautifully for s’mores, and make people say, “Wait… you made these?” in the kind of tone usually reserved for magic tricks and suspiciously good lasagna.
The good news is that making homemade marshmallows is much easier than it sounds. Yes, there is hot sugar syrup involved. Yes, a candy thermometer helps. No, you do not need to become a pastry wizard or light a ceremonial vanilla candle first. You mostly need a mixer, a saucepan, a little patience, and the willingness to accept that for about 10 minutes your kitchen will smell like a candy shop that got its life together.
This guide walks you through the best homemade marshmallows recipe, why it works, how to avoid sticky chaos, and what to do once you have a tray of fluffy squares staring at you like edible pillows. Spoiler: hot chocolate is just the beginning.
Why Homemade Marshmallows Are Better Than Store-Bought
Store-bought marshmallows are built for convenience. Homemade marshmallows are built for joy. The texture is the first big difference. Fresh marshmallows are tender and springy, with a creamy bite that feels nothing like the dry, squeaky chew of the packaged kind. The flavor is also cleaner and more customizable. You can make them richly vanilla, lightly floral, pepperminty, cocoa-dusted, cinnamon-kissed, or dipped in chocolate if you’re feeling dramatic in the best possible way.
Another advantage is control. You decide the flavoring, the size, the coating, and the final use. Want giant marshmallows for campfire s’mores? Easy. Want tidy one-inch cubes for cocoa gifts? Also easy. Want heart shapes for Valentine’s Day, snowflakes for winter, or ridiculously thick squares for homemade dessert boards? Welcome to your marshmallow era.
Homemade marshmallows also make excellent edible gifts. A neat box of powdery vanilla marshmallows looks elegant, feels thoughtful, and costs less than many gourmet treats. In other words, this recipe has range.
What You Need To Make Homemade Marshmallows
Main Ingredients
- 3 packets unflavored gelatin
- 1 cup cold water, divided
- 1 1/2 cups granulated sugar
- 1 cup light corn syrup
- 1/4 teaspoon salt
- 1 tablespoon pure vanilla extract
For Dusting And Cutting
- 1/3 cup confectioners’ sugar
- 3 tablespoons cornstarch
- Nonstick spray or a little neutral oil
Helpful Equipment
- Stand mixer with whisk attachment, or a strong hand mixer
- Medium heavy saucepan
- Candy thermometer
- 9×13-inch glass or ceramic pan
- Offset spatula or silicone spatula
- Sharp knife or kitchen scissors
Could you make marshmallows without some of this? Maybe. Would it be more annoying? Absolutely. A candy thermometer is especially helpful because the texture of the final marshmallow depends on syrup temperature. Too cool and the mixture may stay too loose. Too hot and the marshmallows can become stiffer than you want.
Best Homemade Marshmallows Recipe
Step 1: Prepare The Pan
Generously grease a 9×13-inch pan with nonstick spray. In a small bowl, whisk together the confectioners’ sugar and cornstarch. Lightly dust the greased pan with some of this mixture and set the rest aside for later. This step may seem minor, but it is the difference between “Look how pretty these are” and “Why is my marshmallow glued to the pan like drywall compound?”
Step 2: Bloom The Gelatin
Pour 1/2 cup of the cold water into the bowl of your stand mixer. Sprinkle the gelatin over the water and let it sit while you make the syrup. This gives the gelatin time to absorb the liquid and soften properly. Do not skip blooming unless you enjoy lumpy surprises.
Step 3: Cook The Sugar Syrup
In a medium saucepan, combine the remaining 1/2 cup water, granulated sugar, corn syrup, and salt. Cook over medium heat, stirring just until the sugar dissolves. Once the syrup is clear and no longer gritty, stop stirring. Increase the heat and cook until the mixture reaches 240°F, the classic soft-ball stage.
Keep the thermometer tip in the syrup but not touching the bottom of the pan. Also, try not to stir once the syrup starts boiling. Too much agitation can encourage crystallization, which is a fancy way of saying your smooth candy dreams may suddenly turn gritty.
Step 4: Combine Syrup And Gelatin
Turn the mixer to low speed. Slowly pour the hot syrup into the bloomed gelatin, aiming for the side of the bowl rather than directly onto the whisk. The syrup is extremely hot, so this is the moment to act like a calm adult in a cooking show, even if internally you are whispering, “Please don’t splash, please don’t splash.”
Step 5: Whip Until Thick And Glossy
Once all the syrup is in, gradually raise the mixer speed to high. Beat the mixture for 10 to 12 minutes, or until it turns thick, white, glossy, and dramatically puffed. It should look like marshmallow fluff that has finally achieved self-confidence. Add the vanilla during the last minute of mixing.
The bowl should feel warm or lukewarm rather than hot by the time you are done. That is a good sign the mixture has whipped enough and cooled enough to spread properly.
Step 6: Spread And Set
Quickly scrape the marshmallow mixture into the prepared pan. Smooth the top with a lightly greased spatula, damp fingers, or a spatula lightly moistened with water. Work fairly fast because the gelatin starts setting as soon as the mixture cools.
Dust the top with more of the sugar-cornstarch mixture. Let the marshmallows sit uncovered at room temperature for at least 6 hours, though overnight is even better. Do not refrigerate them. Marshmallows prefer a cool, dry room, not a chilly spa retreat.
Step 7: Cut And Coat
Once set, loosen the edges and turn the slab out onto a surface dusted with the remaining sugar-cornstarch mixture. Use a greased knife or kitchen scissors to cut the marshmallows into squares. Toss each piece in the coating mixture so the sides are no longer sticky.
At this point, you may pause to admire your work. You made marshmallows. On purpose. In your own kitchen. That is objectively cool.
Why This Homemade Marshmallows Recipe Works
The recipe works because it balances three jobs at once: structure, sweetness, and air. Gelatin provides the structure, giving the marshmallows their bounce and sliceable shape. Sugar and corn syrup create the sweet syrupy base and help form the familiar candy texture. Whipping incorporates air, which transforms the hot syrup into something fluffy instead of chewy and dense.
The corn syrup is not there just to be decorative. It helps keep the syrup smooth and reduces the chance of crystallization. The dusting mixture matters, too. Powdered sugar prevents sticking, while cornstarch adds extra insurance so the marshmallows stay soft without welding themselves together in storage.
The long whipping time is also non-negotiable. Under-whipped marshmallow mixture will be looser, less fluffy, and harder to set properly. A full whip gives the mixture volume, stability, and that classic pillowy texture people chase in a great homemade marshmallow recipe.
Tips For Making Perfect Homemade Marshmallows
1. Avoid Humid Weather
Marshmallows and moisture are not best friends. If the day feels like the air could wring itself into a sponge, your marshmallows may stay tackier than usual. A dry day is ideal.
2. Grease More Than You Think You Need
The pan, the spatula, the knife, the cookie cutters, and even your fingers may benefit from a little grease or moisture. Sticky is part of the marshmallow experience, but there is no reason to make it a personal challenge.
3. Do Not Rush The Temperature
Soft-ball stage, around 240°F, is the sweet spot for many classic homemade marshmallow recipes. If you pull the syrup too early, the texture may be too loose. If you let it go too high, your marshmallows may set firmer than expected.
4. Work Quickly After Whipping
Once the marshmallow mixture is fully whipped, get it into the pan right away. It starts setting almost immediately, and a delay can turn smooth spreading into a sticky wrestling match.
5. Let Them Set Fully Before Cutting
Yes, it is tempting to poke them every 15 minutes like a curious scientist. Resist. Fully set marshmallows cut more cleanly and coat more easily.
Easy Flavor Variations
One reason people love learning how to make homemade marshmallows is that the base recipe is so flexible. Once you master the vanilla version, you can branch out without reinventing the wheel.
- Vanilla Bean Marshmallows: Add vanilla bean paste or scraped vanilla bean seeds for a richer, more bakery-style flavor.
- Peppermint Marshmallows: Swap part of the vanilla for peppermint extract and add a dusting of crushed candy cane on top.
- Chocolate Marshmallows: Fold in cocoa powder carefully or dust finished marshmallows with cocoa and confectioners’ sugar.
- Cinnamon Marshmallows: Add a pinch of ground cinnamon for cozy hot-chocolate season energy.
- Espresso Marshmallows: A little espresso powder adds depth and pairs beautifully with cocoa.
- Chocolate-Dipped Marshmallows: Dip cut marshmallows halfway in melted chocolate and let them set on parchment.
Just keep the liquid balance in mind. Concentrated extracts and dry flavorings are usually safer than adding a lot of extra liquid, which can affect the set.
How To Serve Homemade Marshmallows
There are obvious choices, and then there are the choices made by people who have seen the light. The obvious options include hot chocolate, coffee drinks, and s’mores. The more ambitious options include dipping them in chocolate, packing them into gift tins, skewering them for dessert boards, topping sweet potato casserole, or cutting them into tiny cubes for cookie and brownie add-ins.
Homemade marshmallows are also fantastic with graham crackers and dark chocolate because the softer texture makes the whole s’more more luxurious. Instead of one chewy, slightly stubborn marshmallow puck, you get a gooey center that feels almost dessert-shop level. Not bad for sugar, gelatin, and a mixer doing cardio.
How To Store Homemade Marshmallows
After cutting and coating, store homemade marshmallows in an airtight container at room temperature in a cool, dry place. Layer parchment paper between stacks if needed. For the best texture, enjoy them within 1 to 2 weeks. If your kitchen is especially dry and your container seals well, they may last a bit longer, but fresher is better.
Do not refrigerate them unless you enjoy turning soft candy into a strange weather experiment. Refrigeration can introduce moisture and change the texture in all the wrong ways.
Common Marshmallow Mistakes To Avoid
- Not blooming the gelatin: This can lead to uneven texture and poor setting.
- Stirring the boiling syrup too much: That increases the risk of crystallization.
- Pouring the syrup too fast: Slow and steady keeps things smoother and safer.
- Under-whipping the mixture: Less air means flatter, denser marshmallows.
- Skipping the dusting mixture: That is how you create one giant marshmallow instead of individual pieces.
- Trying to cut too soon: Patience makes prettier squares.
Experience: What It’s Really Like To Make Homemade Marshmallows
The first time most people make homemade marshmallows, there is a brief moment of doubt. It usually happens somewhere between clipping on the thermometer and watching sugar bubbles rise in the pot. You start wondering whether this was a charming kitchen adventure or a very sweet mistake. Then the syrup hits the gelatin, the mixer starts running, and everything changes.
At first, the mixture looks unimpressive. It is hot, thin, and not remotely marshmallow-like. A minute or two later, it starts turning pale. Then it grows. Then it grows some more. Suddenly the bowl is full of glossy white fluff and you feel like you have hacked dessert itself. This transformation is one of the best parts of the experience. Homemade marshmallows are fun because the process is visual. You can actually see the texture develop in real time, which makes the recipe feel rewarding even before you taste the final result.
There is also a very specific kind of satisfaction in scraping the mixture into the pan. It is sticky, ridiculous, and slightly chaotic, but in a good way. You smooth the top, dust it with sugar, and then the hardest part begins: waiting. That waiting period is sneaky. You know the marshmallows need hours to set, but every time you pass the kitchen, you feel compelled to peek at them like they are a science fair project with excellent snacks attached.
Cutting them is another memorable moment. Once the slab flips out of the pan and the knife glides through, the whole project suddenly looks real. Little powdery cubes pile up on the board, and they look so much more impressive than the effort required. That is one reason homemade marshmallows have such a strong reputation for gifting. They look fancy. They feel special. But they do not actually require a professional pastry kitchen or a dramatic soundtrack.
The best experience, though, is sharing them. Drop one into hot cocoa and watch it soften into a creamy float. Toast one for s’mores and notice how much more plush and flavorful it is than the standard bagged version. Hand a few to someone who claims they do not care about marshmallows and watch them suddenly care quite a bit. Homemade marshmallows have that effect. They turn a familiar candy into something worth talking about.
And after you make them once, you stop seeing marshmallows as mysterious store items. You start seeing them as a homemade specialty you can pull out for holidays, gifts, winter weekends, bake sales, and random Tuesday confidence boosts. Because honestly, there are few kitchen victories quite as charming as saying, “Oh, these? I made them myself.”
Conclusion
If you have been wondering how to make homemade marshmallows, the answer is simple: bloom gelatin, cook syrup, whip like crazy, spread, set, cut, and try not to eat half the tray before anyone else gets one. This best homemade marshmallows recipe delivers soft, fluffy results with classic vanilla flavor and enough flexibility to support endless variations.
Whether you want a cozy hot chocolate topper, a better s’more, a homemade gift, or just a fun kitchen project that makes you feel unusually accomplished, marshmallows are an excellent choice. They are nostalgic, practical, customizable, and surprisingly impressive for something made from pantry basics. In short, they are proof that sometimes the fluffiest foods have the biggest personality.