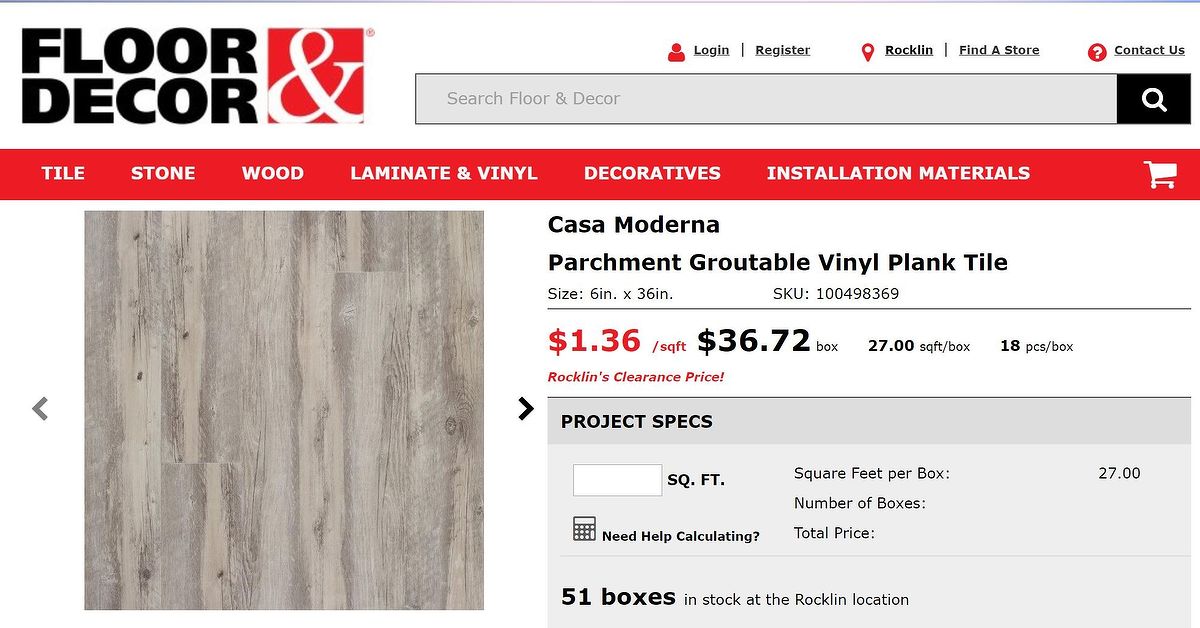
A peel and stick vinyl plank accent wall can deliver the warmth of wood without lumber, nail guns, sawdust, or an awkward conversation with your budget. Modern vinyl planks reproduce wood grain, knots, weathered finishes, and natural color variation surprisingly well. Because each piece arrives with adhesive already applied, the project is approachable for patient beginners and quick enough for an experienced DIYer to complete over a weekend.
There is one important catch: “peel and stick” does not mean “peel and hope.” Vinyl is heavier than wallpaper, gravity is persistent, and an uneven or dusty wall can defeat even strong adhesive. Careful product selection, surface preparation, layout planning, and firm pressure are what turn a stack of flooring-shaped stickers into a convincing feature wall.
Can You Put Peel and Stick Vinyl Planks on a Wall?
Yes, but only when the product manufacturer approves the planks for vertical installation. Some self-adhesive vinyl products are designed specifically for walls and ceilings. Others are flooring materials tested only for horizontal surfaces. A floor-rated adhesive may not resist gravity on drywall, and using the product outside its approved application can void the warranty.
Read the installation manual before buying several boxes. Look for phrases such as “suitable for walls,” “vertical installation,” or “decorative wall plank.” Confirm the approved surfaces, temperature range, acclimation period, moisture restrictions, and whether primer or supplemental fasteners are permitted.
Do not casually add construction adhesive because an online comment said it worked. Some adhesives can react with vinyl, stain the printed layer, release unwanted fumes, or make future removal resemble drywall archaeology. If extra adhesive or brad nails are needed, use only a method approved by the plank manufacturer.
Where a Vinyl Plank Feature Wall Works Best
- Behind a bed as an easy faux-wood headboard
- Behind a television or media console
- On a home-office video-call background
- In an entryway, reading nook, or dining area
- On the back wall of open shelving
- In a finished basement with controlled moisture
Avoid shower enclosures, persistently damp walls, exterior spaces, and unconditioned garages unless the product is specifically rated for those conditions. “Water-resistant” is not the same as waterproof, and it does not cure a leak hiding inside the wall. Keep ordinary vinyl away from fireplaces, unshielded ranges, radiators, and other high-heat locations unless its instructions provide an approved clearance.
Benefits and Limitations
Why DIYers Like Vinyl Plank Walls
Vinyl offers the appearance of reclaimed wood without splinters, sanding, staining, or the weight of solid boards. It is usually easy to wipe clean, and many styles can be cut by scoring the face with a sharp utility knife and snapping the plank. The slim profile also consumes less room than traditional wood paneling.
The project produces relatively little mess. There is no grout to mix and, with a wall-rated self-adhesive product, no bucket of wet glue to carry across the carpet like a contestant in a very specific game show.
What to Consider Before Committing
A strong peel and stick product may remove paint or tear drywall paper when it is taken down. For that reason, a vinyl plank accent wall should not automatically be treated as renter-friendly. Printed wood grain can also look repetitive if identical planks are installed next to one another. Finally, every bump, ridge, and repair beneath thin vinyl may become visible under side lighting.
Order a sample and leave it on an inconspicuous portion of the wall for the period recommended by the manufacturer. The test reveals how well the adhesive bonds, whether the wall texture telegraphs through the material, and how the color looks in morning and evening light.
Tools and Materials
- Wall-approved peel and stick vinyl planks
- Tape measure and pencil
- Four-foot level or laser level
- Carpenter’s square and metal straightedge
- Sharp utility knife with spare blades
- Cut-resistant work gloves and safety glasses
- Wallpaper seam roller or manufacturer-approved hand roller
- Plastic smoothing tool
- Spackle, putty knife, and fine-grit sandpaper
- Vacuum and lint-free cloths
- Wall cleaner recommended for the painted surface
- Primer, if required by the plank manufacturer
- Cardboard for templates and a cutting mat
- Matching trim or molding, if desired
A fresh blade matters more than it appears. A dull knife can wander away from the straightedge, crush the edge, or tempt you to apply excessive force. Change blades whenever scoring becomes difficult.
How Much Vinyl Plank Do You Need?
Measure the wall’s width and height in feet, then multiply the numbers to calculate square footage. Subtract large openings only if they remove a meaningful amount of material. Small outlets should remain in the calculation because cutting around them creates waste.
For example, a wall measuring 10 feet wide by 8 feet high covers 80 square feet. Adding 10% for straight layouts produces a target of 88 square feet. A herringbone or diagonal pattern normally requires more waste, often around 15% to 20%, depending on the room and product.
Divide the adjusted wall area by the coverage listed on each box and round up. If one carton covers 20 square feet, an 88-square-foot order requires five cartons. Buy all cartons together and confirm their lot or batch information when applicable. Keeping one unopened box or several full planks also gives you replacements for future damage.
Prepare the Wall for Reliable Adhesion
Surface preparation is the least glamorous portion of the project and the part most likely to determine whether the finished planks remain flat. The ideal wall is structurally sound, smooth, dry, clean, and fully cured.
Inspect and Repair the Surface
Remove nails, anchors, hooks, loose paint, and adhesive residue. Fill dents, cracks, and unused holes with spackle. Sand high areas and patched sections until the surface feels even when you slide a hand across it. Vacuum the wall and nearby baseboard so sanding dust does not return during installation.
Heavy orange-peel, knockdown, masonry, brick, unfinished drywall, and crumbling plaster are generally poor candidates for direct application. Texture reduces the contact area available to the adhesive. If the manufacturer permits installation after resurfacing, skim-coat or cover the wall with an approved smooth substrate, then prime it as directed.
Clean Without Leaving Residue
Dust, grease, wax, silicone, and soap residue interfere with pressure-sensitive adhesive. Clean the wall using the method recommended for its paint and for the vinyl product. Kitchen walls may require extra degreasing. Follow with any required rinse, and allow the surface to dry completely.
Do not assume a freshly painted wall is ready. Paint may feel dry while still curing beneath the surface. Many peel and stick wall-product manufacturers specify a curing period of several weeks. Follow the paint and plank instructions, using the longer period if they differ.
Acclimate the Planks
Place the cartons flat in the installation room for the manufacturer’s required acclimation period, commonly at least 24 to 48 hours. Maintain the recommended room temperature before, during, and after installation. This lets the vinyl adjust to the space and reduces movement caused by an abrupt environmental change.
Plan the Accent Wall Layout
Open several cartons and sort the planks by color and grain. Mixing pieces from different boxes makes the wall look more natural and minimizes subtle shade differences. Identify repeated prints, distinctive knots, and dark streaks so matching “twins” do not end up side by side.
Choose a Pattern
A horizontal layout visually widens a narrow room and is usually the easiest arrangement for beginners. Vertical planks can make a low ceiling appear taller. Diagonal and herringbone patterns create greater movement but require more cuts, more material, and considerably more patience.
For a classic staggered wall, vary the starting lengths from one row to the next. Avoid lining up multiple end joints or creating a repeated stair-step effect. As a practical example, alternate rows beginning with a full plank, a two-thirds plank, and a one-third plank, provided the resulting pieces satisfy the manufacturer’s minimum length requirements.
Dry-Fit Before Removing Any Backing
Measure the plank width and divide the wall height by that dimension. If the final row would be an awkward sliver, trim the first row so the top and bottom courses appear more balanced. Perform the same check across the wall to prevent a tiny piece at one corner.
Walls, ceilings, and baseboards are rarely perfectly level. Establish a genuinely level horizontal reference line instead of trusting the baseboard. The first row controls every row after it; a small error at the bottom can become a noticeable wedge near the ceiling.
How to Install a Peel and Stick Vinyl Plank Accent Wall
-
Remove Covers and Make the Area Safe
Move furniture away from the wall and protect the floor. If outlets or switches are present, turn off the appropriate circuit at the breaker panel and verify that the power is off before removing the cover plates. Never cover an electrical box or place material where it prevents a device from being mounted safely.
-
Mark the Starting Line
Use a level or laser to draw the planned reference line. Recheck its position at several points. If installing from the bottom, account for any trimmed first-row width and the clearance required by the product instructions.
-
Cut the First Plank
Measure the required length and mark the face. Place the plank on a cutting mat, align a metal straightedge, and make several controlled scoring passes. Snap or cut through the material according to the manufacturer’s directions. Test the fit with the backing still attached.
-
Apply the First Piece Carefully
Peel back only a portion of the release liner. Align the plank with the reference line and lightly tack one edge. Once it is correctly positioned, remove the remaining liner gradually while smoothing the plank onto the wall. Avoid touching the adhesive because skin oils and dust can weaken the bond.
-
Press the Entire Surface
Work from the center toward the edges to remove trapped air. Roll the face and seams firmly using the pressure and tool specified by the manufacturer. Pay particular attention to corners and plank ends, where lifting often begins.
-
Complete the First Row
Install neighboring pieces with straight, tight seams unless the instructions require an expansion gap. Check the row repeatedly with a level. Correct an error immediately if the product is repositionable; once a strong adhesive develops its full bond, negotiation becomes less productive.
-
Stagger the Following Rows
Begin the second row with a shorter plank to offset the joints. Continue mixing colors and grain patterns while checking every few pieces for level and alignment. Do not repeat the same starter sequence so often that the wall develops obvious diagonal steps.
-
Cut Around Outlets and Switches
Create a cardboard template for each opening and transfer it to the plank. Cut only enough material to clear the electrical box; the cover plate should hide the edge without concealing an oversized gap. Consult an electrician if the added wall thickness affects the safe position of the receptacle or requires an approved box extender.
-
Fit the Final Row
Measure the remaining space at several locations because ceilings are not always parallel to floors. Transfer those measurements to each plank, trim carefully, and dry-fit before exposing the adhesive. Matching trim can hide a modest perimeter gap, but it cannot rescue a row cut with cheerful disregard for measurement.
-
Apply Final Pressure and Add Trim
Roll the entire accent wall again, following the specified pattern and pressure. Install optional side, top, or corner trim without pinning the vinyl so tightly that it cannot move as designed. Replace electrical covers only after the devices are safely positioned, then restore power.
Common Mistakes to Avoid
- Using floor-only material: Confirm that the product is approved for walls before purchasing it.
- Installing over texture: Adhesive touches only the high points, allowing edges to loosen.
- Skipping acclimation: Cold or recently transported planks may expand, contract, or bond poorly.
- Trusting the baseboard: Establish an independent level reference line.
- Ignoring repeated grain: Separate identical prints to preserve a natural appearance.
- Peeling the entire liner immediately: Gradual removal provides better control and reduces bubbles.
- Using unapproved extra glue: It can damage vinyl, complicate removal, or invalidate the warranty.
- Assuming removal will be damage-free: Strong adhesive can lift paint or drywall paper.
- Skipping final pressure: Pressure-sensitive adhesive needs uniform contact to develop a dependable bond.
Care, Repairs, and Removal
Dust the wall with a microfiber cloth or soft vacuum attachment. For marks, use a damp cloth and a mild cleaner approved for vinyl. Avoid abrasive pads, harsh solvents, excessive water, and steam. Inspect the edges periodically, especially after major seasonal changes in indoor temperature or humidity.
If a plank becomes damaged, replacement is easier when spare pieces from the original batch are available. Follow the manufacturer’s removal process. It may involve gently warming the plank to soften the adhesive, lifting one corner, and pulling slowly at a low angle. Too much heat can deform vinyl or damage the wall, so a heat gun should not be treated like a flamethrower with a power cord.
Plan for touch-up work after removal. Even products described as removable may affect weak paint, uncured coatings, or drywall paper. Test any adhesive-residue remover in a hidden area before using it broadly.
Experience-Based Lessons From a Vinyl Plank Wall Project
The most valuable lesson from successful peel and stick accent wall projects is that the visible installation is only half the job. A wall can look clean from across the room while still carrying a fine layer of sanding dust. Wiping it with a white cloth is a useful final test. If the cloth picks up powder, the adhesive will collect that powder instead of bonding fully to the wall.
Layout planning also saves more material than heroic cutting skills. Setting ten or twelve planks on the floor before installation exposes repeated wood-grain prints immediately. Rotating through light, medium, and dark pieces creates a more convincing random pattern. Without this step, two identical knots can appear together and look like a pair of cartoon eyes watching television over your shoulder.
The first row deserves a disproportionate amount of time. It is tempting to move quickly because the process feels simple after the first plank sticks. However, a slight tilt compounds as rows rise. Checking the first row at every plank feels slow, but correcting a crooked wall near the ceiling is much slower. A laser level is convenient, though a long spirit level and a fine pencil line work perfectly well.
Cutting improves when measurements are transferred to the front of the plank and checked against its intended orientation. Outlet openings are where mirrored mistakes frequently happen. A cardboard template prevents this problem and lets the installer test the opening without sacrificing a plank. Labeling the template “front,” “top,” and “left” may seem excessive until the first confusing cut.
Working in short sections is another practical advantage. Applying three or four planks and then rolling them keeps attention on alignment and adhesion. Waiting until the entire wall is covered can leave missed edges, bubbles, or loose corners hidden in the pattern. Firm pressure should be systematic rather than a ceremonial swipe at the end.
Breaks matter, too. As fatigue increases, cuts become less accurate and grain selection becomes less thoughtful. Stopping for ten minutes after several rows often prevents an hour of repair. Keeping backing sheets and scraps in one box also stops the room from becoming a slippery confetti festival.
Finally, the best result usually comes from restraint. One feature wall provides texture and warmth without making the room resemble the inside of a vinyl shipping crate. Simple furniture, solid bedding, restrained artwork, and warm lighting allow the faux-wood finish to read as intentional architecture. Once installed neatly, the wall becomes a strong background rather than a project loudly requesting applause.
Frequently Asked Questions
Will peel and stick vinyl planks stay on textured walls?
Most products bond best to smooth, flat, clean, and fully cured painted surfaces. Heavy texture reduces adhesive contact and may remain visible through thin vinyl. Test a sample and follow the manufacturer’s approved-surface requirements.
Should I add construction adhesive?
Not unless the vinyl manufacturer specifically approves the adhesive and application method. An incompatible product can stain or soften vinyl, create emissions, damage drywall, and void the warranty.
Is a vinyl plank wall suitable for a bathroom?
It may work on a dry bathroom feature wall if the product is approved for that location and the room has effective ventilation. Do not install ordinary decorative vinyl inside a shower or over a damp wall. Verify the product’s moisture rating rather than relying on the word “vinyl.”
Can the planks be removed without wall damage?
Possibly, but damage-free removal is never guaranteed. Adhesion strength, paint quality, curing time, wall preparation, and removal technique all affect the outcome. Assume that minor patching and repainting may be necessary.
How long does installation take?
A simple rectangular wall can often be installed over a weekend, including preparation and layout. Repairs, wall texture, electrical openings, intricate patterns, and trim work can extend the schedule. Acclimation and paint-curing periods occur before active installation and should not be rushed.
Conclusion
A DIY peel and stick vinyl plank accent wall is a manageable way to add wood-inspired color and texture without conventional paneling. Its success depends less on peeling the backing and more on choosing a wall-rated product, preparing a smooth surface, establishing an accurate starting line, varying the grain, and applying consistent pressure.
Take the time to test a sample, calculate waste, and read the product instructions from beginning to end. Those quiet preparation steps are what keep the finished wall looking deliberate long after the utility knife has returned to the toolbox.