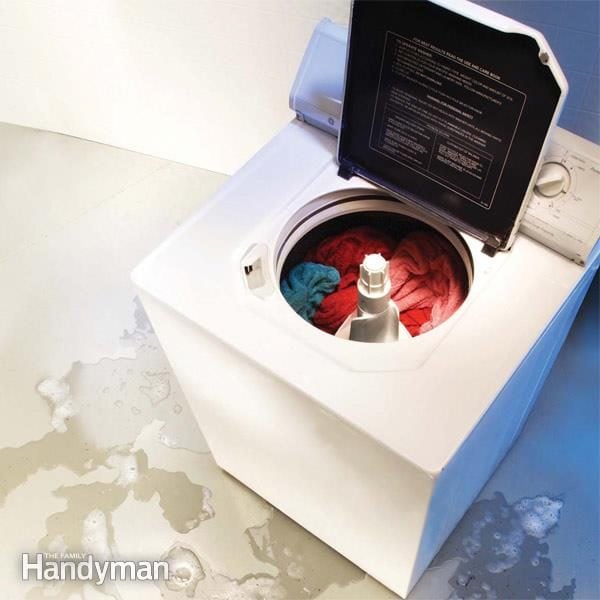
A leaking washing machine has a special talent for making an ordinary laundry day feel like a tiny indoor weather event. One minute you are washing towels, and the next you are standing in socks that have become unwilling participants in a swamp documentary. The good news is that many washer leaks are not mysterious, dramatic, or expensive. In fact, a large number of leaks come from loose hoses, worn rubber washers, clogged drain parts, dirty door seals, too much detergent, or a machine that is shaking like it just heard bad news.
This guide explains how to repair a leaking washing machine using practical DIY steps. You will learn how to locate the leak, inspect the most common problem areas, replace simple parts, prevent future leaks, and decide when it is time to call an appliance repair professional. Whether you own a top-load washer, front-load washer, high-efficiency model, or an older machine that has been faithfully eating socks since the early 2000s, the troubleshooting process is similar: make it safe, find the source, fix the simple stuff first, and avoid turning one leak into a full laundry-room aquarium.
Safety First: Do This Before Touching the Washer
Before diagnosing or repairing a washing machine leak, unplug the washer from the electrical outlet. Water and electricity are not friends; they are the kind of roommates who should never share a kitchen. Next, turn off the hot and cold water supply valves behind the machine. If there is standing water on the floor, dry the area before moving the washer or kneeling near it.
If the washer is full of water, use the drain or spin cycle only if it is safe to do so and the leak is minor. For a major leak, bail out the tub with a cup or small container, then drain remaining water through the drain hose or pump filter if your model has one. Always check your owner’s manual before removing panels or parts, because washer designs vary by brand and model.
Tools and Supplies You May Need
You do not need a truck full of tools to fix most washing machine leaks. For many DIY repairs, a basic toolkit is enough. Gather towels, a bucket, adjustable pliers, a flashlight, a screwdriver set, work gloves, replacement hose washers, new water supply hoses if needed, zip ties, a small brush, and possibly a putty knife for releasing clips on some washer panels. If you suspect a pump, door boot seal, water inlet valve, or internal hose has failed, order the exact replacement part using the model number from your washer’s rating label.
The model number is usually found inside the washer lid, around the door opening, on the back panel, or behind a small access door. Do not guess. Washing machine parts can look almost identical but fit differently, which is how a five-minute repair becomes a three-day hobby with shipping fees.
Step 1: Find Where the Leak Is Coming From
The location of the puddle gives you the first clue. Water behind the washer often points to fill hoses, drain hoses, faucet connections, or a standpipe issue. Water at the front of a front-load washer usually suggests a dirty or damaged door gasket, a blocked dispenser, or too much detergent. Water underneath the washer can come from a drain pump, tub-to-pump hose, internal hose clamp, tub seal, or water inlet valve. Water overflowing from the top of a top-load washer may be caused by oversudsing, overloading, a water level problem, or a pressure switch issue.
To inspect the leak, place dry towels around the washer and run a short cycle while watching carefully with a flashlight. Do not walk away. Leaks often appear only during specific moments: filling, agitating, draining, rinsing, or spinning. Knowing when the leak starts is just as useful as knowing where it appears.
If the Washer Leaks While Filling
Look at the hot and cold inlet hoses, faucet connections, rubber washers, and water inlet valve. A steady drip even when the washer is off may indicate a leaking supply connection or faulty inlet valve.
If the Washer Leaks While Draining
Check the drain hose, standpipe, pump filter, drain pump, and internal drain hoses. A leak during draining often means water is escaping under pressure.
If the Washer Leaks During Spin
Inspect for loose hoses, worn seals, unbalanced loads, or excessive vibration. A washer that dances across the floor may eventually loosen connections.
Step 2: Check the Water Supply Hoses
Water supply hoses are among the most common sources of washing machine leaks. These hoses connect the wall faucets to the washer’s water inlet valve. Over time, rubber washers inside the hose ends can flatten, crack, or disappear entirely, probably into the same dimension as missing socks.
Pull the washer away from the wall carefully. Inspect both hoses from end to end. Look for bulges, cracks, corrosion, wet fittings, mineral deposits, and loose connections. If the leak is at the threaded connection, turn off the water, unscrew the hose, and check the rubber washer inside. Replace worn or missing hose washers. Reattach the hose straight, avoiding cross-threading, and tighten it by hand first. Then use pliers for a small additional turn. Do not over-tighten, because crushing the washer or damaging the threads can create a new leak.
If the hose itself is cracked, swollen, rusty, or older than a few years, replace it. Braided stainless steel washer hoses are generally more durable than basic rubber hoses and are a smart upgrade for preventing future water damage. After reconnecting everything, turn the water supply back on slowly and watch for drips.
Step 3: Inspect the Drain Hose and Standpipe
The drain hose carries used wash water out of the machine and into a standpipe, laundry sink, or drain system. If the drain hose is loose, cracked, kinked, pushed too far into the standpipe, or not inserted far enough, water can splash, back up, or leak during the drain cycle.
Check the hose where it attaches to the washer and where it enters the drain. Make sure it is secure but not crushed behind the machine. A kinked drain hose can slow water flow and cause backups. If the hose is split or brittle, replace it with a compatible drain hose. If water spills from the standpipe during draining, the issue may be household plumbing rather than the washer. A clogged standpipe or slow drain can cause water to overflow even when the washer is working properly.
Most washers also need the drain hose positioned at the correct height. If it is too low, water can siphon out of the washer. If it is installed incorrectly, the machine may fill and drain at the same time, which is not laundry efficiency; it is plumbing slapstick. Consult your washer’s installation guide for the correct standpipe height and insertion depth.
Step 4: Clean the Front-Load Door Gasket
Front-load washers have a rubber door gasket, also called a boot seal or bellow. This flexible seal keeps water inside the drum while allowing the door to close tightly. Unfortunately, it is also a favorite hiding place for lint, hair, coins, detergent residue, and the occasional tiny object that looks guilty.
Open the washer door and inspect the gasket carefully. Pull back the folds and look for debris, slime, mold, tears, punctures, or hardened detergent buildup. Even a strand of hair or pet fur on the sealing surface can allow a small drip. Wipe the gasket with a damp cloth and mild cleaner. For residue, use a soft brush. Avoid sharp tools that can cut the rubber.
If the gasket has a visible tear, hole, or warped section, cleaning will not solve the problem. The door boot seal must be replaced. This is a moderate DIY repair. On many front-load washers, you will need to remove the outer retaining spring, peel back the gasket, remove the inner clamp, detach the old boot, and install the new one in the correct orientation. Take photos before removing parts so you know how everything fits. A backward boot seal can leak faster than a gossip at brunch.
Step 5: Use the Right Detergent and Stop Oversudsing
Not every washer leak is caused by a broken part. Sometimes the culprit is detergent. High-efficiency washers require HE detergent, which produces fewer suds. Regular detergent or too much HE detergent can create excess foam that escapes from the dispenser, door, vent, or overflow area. If you see sudsy water, white residue, or leaking during wash or rinse cycles, detergent may be the troublemaker.
Use only the recommended amount of detergent for your load size, soil level, and water hardness. More detergent does not mean cleaner clothes. It often means residue, odor, poor rinsing, and leaks. If your washer has been oversudsing, run a cleaning cycle or empty hot cycle to clear residue. Clean the dispenser drawer and the area around it, because clogged dispenser channels can redirect water out the front.
Step 6: Check the Detergent Dispenser
A leaking detergent dispenser is common on front-load washers and some high-efficiency top-load models. Remove the dispenser drawer if your washer allows it. Look for caked detergent, fabric softener sludge, mold, or blocked openings. Rinse the drawer under warm water and scrub the corners with a small brush.
Also inspect the dispenser housing. If water cannot flow smoothly into the tub, it may leak out of the drawer. Use less detergent, dilute thick fabric softener if the manual allows it, and avoid products that are not recommended for your machine. If the dispenser is cracked or the housing is damaged, replacement may be necessary.
Step 7: Clean the Drain Pump Filter
Many front-load washers have a drain pump filter behind a small access door near the bottom front of the machine. This filter catches coins, lint, buttons, hairpins, and other laundry treasures. When it clogs, water may drain slowly, back up, or leak from the filter area.
Unplug the washer. Place towels and a shallow pan under the access door. Slowly open the drain tube or filter cap, depending on your model. Let water drain gradually. Remove debris from the filter, clean the cap gasket, and reinstall it securely. If the cap is cross-threaded or loose, it can leak. Run a short drain cycle and check for moisture around the filter door.
If your washer does not have an accessible filter, the pump or hose may still be clogged internally, but reaching it may require removing a panel. Only continue if you are comfortable with basic appliance disassembly.
Step 8: Inspect the Drain Pump
The drain pump moves water out of the washer. If the pump housing cracks, the seal fails, or the pump bearings wear out, water can leak from underneath the machine. A bad pump may also make grinding, humming, or rattling noises, especially during draining.
To inspect the pump, unplug the washer and remove the appropriate access panel. On some models, the pump is at the front bottom; on others, it is underneath or behind the rear panel. Look for water trails, mineral stains, rust, or dripping around the pump. Check the hoses connected to the pump and make sure the clamps are tight.
A leaking drain pump is usually replaced rather than repaired. Before buying a new pump, verify the part number using your washer model. When replacing it, take photos of wire connectors and hose positions. Clamp off or drain hoses before removal to avoid surprise water. Surprise water is the least charming kind.
Step 9: Check Internal Hoses and Clamps
Inside the washer, several hoses move water between the tub, pump, dispenser, and valves. These hoses can crack, loosen, or rub against the cabinet. Spring clamps can weaken, and screw clamps can loosen from vibration.
With the washer unplugged and water turned off, remove the access panel recommended by your service manual. Use a flashlight to inspect hoses for wet spots, splits, bulges, and white mineral trails. Pay close attention to the large tub-to-pump hose and smaller dispenser hoses. If a clamp is loose, reposition it and tighten carefully. If a hose is soft, cracked, sticky, or damaged near the clamp, replace it.
Step 10: Inspect the Water Inlet Valve
The water inlet valve controls hot and cold water entering the washer. It sits where the supply hoses connect to the back of the machine. If the valve body cracks or its internal seals fail, it may drip while filling or even when the washer is off. Signs of a faulty inlet valve include slow filling, overfilling, incorrect water temperature, or a persistent drip into the tub.
Check around the valve for moisture. Make sure the leak is not simply from the hose connection. If the valve itself is leaking, replacement is the usual fix. This repair involves disconnecting hoses, removing the top or rear panel, labeling wire connectors, and installing the new valve. It is manageable for careful DIYers, but if wiring makes you nervous, call a professional. There is no shame in respecting electricity. Electricity has a very aggressive personality.
Step 11: Look for Overloading and Balance Problems
Overloading a washing machine can force water where it should not go. Large bulky items, such as comforters, bath mats, and heavy towels, can create imbalance during spin. The tub may bang against the cabinet, hoses may shift, and water may splash over the tub ring in top-load washers.
Run a smaller test load. If the leak disappears, your washer may not be broken; it may simply be protesting your laundry ambitions. Follow the load size recommendations in the manual. Distribute clothes evenly around the tub. For front-load washers, avoid jamming items against the door gasket. For top-load washers, do not pack clothes tightly around the agitator or impeller.
Step 12: Level the Washing Machine
A washer that is not level can vibrate, walk, bang, and leak. Place a level on top of the machine from side to side and front to back. Adjust the leveling feet until the washer sits evenly and does not rock. Lock the adjustment nuts if your washer has them.
Leave enough space behind the washer so hoses are not crushed against the wall. A few inches of clearance can prevent kinks, rubbing, and accidental disconnections. After leveling, run a rinse and spin cycle while watching for movement. A stable washer is a happier washer, and a happier washer is less likely to redecorate your floor with rinse water.
When a DIY Repair Is Not the Best Idea
Some washing machine leaks are better handled by a professional. Call an appliance repair technician if you see water near electrical components, smell burning, find oil under the washer, suspect a cracked outer tub, or discover a failed tub seal or bearing. These repairs can be labor-intensive and may require special tools.
Also consider the age and value of the washer. Replacing a hose, gasket, pump filter, or drain pump can make sense. Replacing a major tub assembly on an old washer may not. As a practical rule, compare the repair cost with the price of a replacement machine. If the washer is more than eight to ten years old and the repair is expensive, replacement may be the smarter long-term decision.
How to Prevent Future Washing Machine Leaks
Preventive maintenance is much cheaper than repairing water damage. Inspect water supply hoses every six months. Replace worn hoses before they fail. Keep the washer level. Clean the detergent dispenser regularly. Wipe the front-load door gasket after use and leave the door slightly open so moisture can evaporate. Use HE detergent in HE washers and measure it instead of pouring with the confidence of a cooking show host.
Clean the drain pump filter as recommended by your manufacturer. Do not overload the machine. Remove coins, screws, nails, and hairpins from pockets before washing. Install a washer drain pan if your laundry room is upstairs or near finished flooring. For extra protection, consider automatic shutoff valves or leak sensors near the washer. These devices can help prevent a small hose failure from becoming a ceiling stain in the room below.
Quick Troubleshooting Chart
| Leak Location | Likely Cause | DIY Fix |
|---|---|---|
| Behind washer | Loose fill hose, bad hose washer, cracked hose | Tighten connection or replace washer hoses |
| From drain area | Loose drain hose, clogged standpipe, incorrect hose position | Secure hose, clear drain, adjust installation |
| Front of front-load washer | Dirty or torn door gasket | Clean gasket or replace door boot seal |
| Dispenser drawer | Detergent buildup or oversudsing | Clean drawer and use less HE detergent |
| Under washer during drain | Drain pump or internal hose leak | Clean filter, tighten clamps, replace pump if leaking |
| Top or overflow area | Overloading, oversudsing, water level issue | Reduce load, use correct detergent, inspect pressure system |
DIY Experience: Lessons From Real Laundry-Room Leaks
One of the best lessons in washing machine leak repair is this: start with the boring parts first. The dramatic part in your imagination may be a cracked tub, a ruined motor, or a repair bill that makes your wallet whisper goodbye. But the real problem is often a $2 rubber washer, a loose clamp, or a drain hose that got shoved too far into the standpipe. In DIY repair, boring is beautiful.
A common real-world example is the mysterious puddle behind the washer. Many homeowners assume the machine itself is failing. They pull up shopping tabs for new washers and begin emotionally preparing to say farewell. Then they discover the cold-water hose connection is barely loose. One careful tightening and a new hose washer later, the floor stays dry. The washer was not dying; it was just being mildly annoying.
Another experience involves front-load door leaks. A homeowner may see water dripping from the door and immediately think the gasket needs replacement. Sometimes it does. But often, the gasket is simply dirty. Pet hair, lint, and detergent residue build up along the sealing surface. After a careful cleaning, the leak stops. This is why inspection matters. Replacing parts before cleaning and testing is like buying new shoes because your old ones have mud on them.
Drain pump filter leaks are also surprisingly common. The filter gets opened for cleaning, then reinstalled slightly crooked. During the next drain cycle, water seeps out from the access panel. The fix is usually simple: remove the cap, inspect the gasket, clean the threads, and reinstall it straight and snug. The trick is patience. Small plastic caps are not impressed by brute force. Cross-threading them can turn routine maintenance into a replacement part order.
Overloading is another sneaky leak-maker. A washer packed with towels may splash water over the tub ring or shake hard enough to loosen a hose. The leak appears mechanical, but the actual repair is behavioral: smaller loads, balanced laundry, and less detergent. This is not glamorous advice, but neither is mopping a laundry room at midnight.
The biggest DIY mistake is skipping the test cycle. After every repair, run a short cycle while watching the washer. Use a flashlight. Keep towels nearby. Check during filling, washing, draining, and spinning. A connection that looks dry at rest may leak under pressure. A drain hose that seems secure may jump when water rushes through it. The test cycle is your final exam, and unlike high school algebra, you will actually use this information in real life.
Finally, know when to stop. Replacing hoses, cleaning filters, leveling the washer, and changing a pump are reasonable DIY tasks for many homeowners. But cracked tubs, bearing failures, electrical faults, and major seal repairs can become expensive and frustrating. A good DIYer is not someone who fixes everything alone. A good DIYer knows the difference between saving money and adopting a broken appliance as a full-time emotional support project.
Conclusion
Repairing a leaking washing machine starts with calm troubleshooting. Unplug the washer, shut off the water, locate the leak, and inspect the simplest causes first: supply hoses, rubber washers, drain hose placement, detergent use, dispenser buildup, door gasket debris, pump filter clogs, and machine leveling. Many leaks are inexpensive DIY fixes, especially when caught early.
For more involved problems, such as a cracked drain pump, damaged inlet valve, torn door boot, or leaking internal hose, order the correct model-specific part and take photos before disassembly. If the leak involves electrical components, a cracked tub, a failed bearing, or an expensive repair on an older machine, call a professional or compare the cost of replacement. The best repair is the one that leaves your laundry clean, your floor dry, and your weekend still recognizable.
Note: Always follow your washer’s owner’s manual, unplug the appliance before inspection, and turn off the water supply before removing hoses or panels.