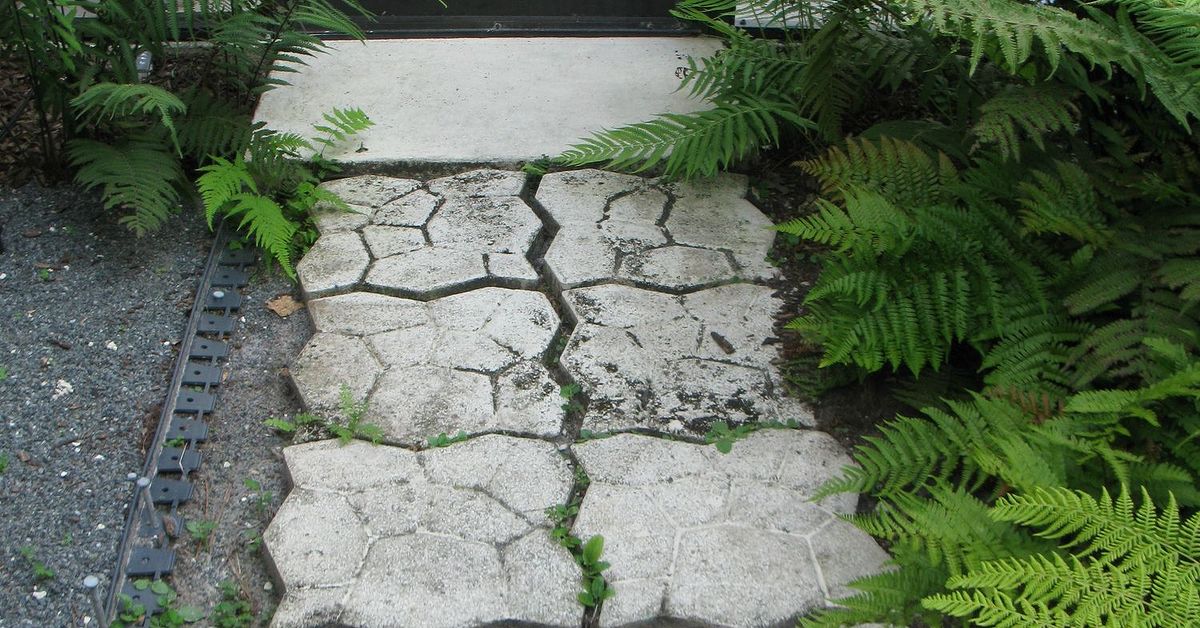
A paver walkway is one of those home improvement projects that looks fancy enough to make neighbors slow down, yet practical enough to tackle with basic tools, a free weekend, and a little patience. It can guide guests from the driveway to the front door, create a charming garden path, or rescue your lawn from the mysterious muddy shortcut everyone keeps taking.
The good news? Learning how to install a paver walkway is not rocket science. The slightly less good news? It is absolutely ground science. The secret to a long-lasting DIY paver walkway is not the prettiest paver, the most dramatic pattern, or the playlist you choose while digging. It is the base. A properly excavated, compacted, leveled, and edged walkway can stay smooth and attractive for years. A rushed base, on the other hand, may shift, sink, wobble, and generally behave like a bad folding chair.
This guide walks through the full paver walkway installation process, from planning and excavation to laying pavers, adding polymeric sand, and maintaining the finished path. Whether you are building a straight sidewalk-style route or a curved garden walkway, the same principles apply: plan the slope, build a stable foundation, keep the lines clean, and do not underestimate the humble plate compactor.
Why Choose a Paver Walkway?
Pavers are popular because they combine durability with design flexibility. Concrete pavers, brick pavers, and natural stone pavers come in many shapes, colors, textures, and sizes. That means your walkway can look classic, modern, rustic, formal, cottage-style, or “I accidentally watched one landscaping video and now I own a wheelbarrow.”
Compared with poured concrete, pavers are easier to repair because individual units can be lifted and replaced. If one paver cracks or settles, you do not have to tear out the whole walkway. Pavers also offer better visual interest than plain concrete and can be arranged in patterns such as running bond, basket weave, herringbone, stacked bond, or random stone layouts.
A properly installed paver path can improve curb appeal, reduce mud tracking, define outdoor spaces, and make your yard feel more finished. It is also a practical upgrade for high-traffic areas where grass refuses to grow because everyone keeps walking there anyway.
Tools and Materials You Will Need
Before you start digging, gather your supplies. Few things slow down a paver walkway project like realizing your tamper is still at the rental desk or your level is hiding behind holiday decorations.
Common Tools
- Shovel and garden rake
- Tape measure
- Stakes and mason’s string
- Line level or 4-foot level
- Wheelbarrow
- Hand tamper or plate compactor
- Rubber mallet
- 2×4 board for screeding
- 1-inch PVC pipe or metal conduit for leveling sand
- Push broom
- Utility knife for landscape fabric
- Safety glasses, gloves, and hearing protection
Materials
- Pavers of your choice
- Crushed stone or paver base material
- Leveling sand or bedding sand
- Landscape fabric, if needed for soil separation
- Paver edging or edge restraints
- Landscape spikes
- Polymeric sand or jointing sand
For a pedestrian walkway, many installers use a compacted gravel base of about 4 to 6 inches, topped with roughly 1 inch of bedding sand. Soil conditions, climate, drainage, and the paver manufacturer’s instructions can change those numbers, so always check local recommendations before buying materials. Clay soil, freeze-thaw climates, and poor drainage may require a deeper base.
Step 1: Plan the Walkway Layout
Start by deciding where the walkway should go. A front walkway usually benefits from a direct, comfortable route. A garden path can curve more naturally. Curves look beautiful, but they often require more cutting, more edge work, and more time spent saying, “That looks almost right.”
Use stakes and string to outline straight sections. For curves, use a garden hose, rope, or marking paint to test the shape. Walk the route several times. If the path feels awkward, too narrow, or oddly placed, adjust it before you dig. Dirt is easier to move in your imagination than in real life.
A comfortable residential walkway is often 3 to 4 feet wide. A narrow garden path may be closer to 2 feet wide, while a main entry path should allow two people to pass without performing a polite sideways shuffle.
Think About Drainage
A paver walkway should never trap water against your house. Plan a slight slope away from buildings, steps, or foundations. A common target is about 1/8 inch to 1/4 inch of drop per foot, depending on the site. The goal is simple: water should leave the walkway, not move in, throw a party, and invite moss.
Step 2: Calculate Materials
Measure the walkway length and width to calculate square footage. Multiply length by width, then add 5 to 10 percent extra for cuts, curves, breakage, and future repairs. If you are installing an angled or curved pattern, buy closer to the higher end of that range.
For base material, calculate volume based on depth. A 4-inch compacted base across a 100-square-foot walkway requires more material than it appears at first glance. Remember that gravel compacts, so you may need slightly more loose material than the finished depth suggests.
When ordering pavers, check whether they are sold by the piece, pallet, square foot, or project kit. Also confirm whether the listed size includes spacer tabs. Small differences matter when your pattern has to fit neatly between edging.
Step 3: Excavate the Walkway Area
Excavation is where the project starts feeling real. Remove grass, roots, topsoil, and loose material from the marked path. Dig deep enough to allow for the paver thickness, bedding sand, compacted base, and desired finished height.
For example, if your pavers are 2 3/8 inches thick, your sand layer is 1 inch, and your compacted base is 4 inches, you need to excavate roughly 7 3/8 inches below the final surface height. Add a little extra if you need to correct grade or improve drainage.
Keep the excavation bottom as even as possible. Do not simply dig random craters and hope gravel will forgive you. The base should sit on firm, undisturbed soil. If you encounter soft spots, remove the weak soil and replace it with compacted base material.
Step 4: Compact the Soil
Once the soil is excavated, compact it thoroughly. This step is easy to skip and expensive to regret. A firm subgrade reduces future settling and helps the entire walkway behave like one stable surface instead of a collection of independent wobble tiles.
For small walkways, a hand tamper can work, although it requires stamina and a willingness to question your life choices. For larger projects, renting a plate compactor is usually worth it. Make several passes over the soil, especially along the edges and corners.
Step 5: Add Landscape Fabric if Needed
Landscape fabric is not always required, but it can help separate the soil from the gravel base, especially in areas with clay, loose soil, or poor drainage. Lay the fabric over the compacted soil and overlap seams by several inches. Trim it to fit the walkway shape.
Do not rely on fabric as a magic weed shield. Weeds often grow from seeds that land on top of the walkway, not from prehistoric roots tunneling up from the underworld. The real benefit is soil separation and base stability.
Step 6: Install and Compact the Paver Base
Spread crushed stone or paver base material over the excavated area. For best results, add it in layers rather than dumping the full depth at once. A 2- to 3-inch layer is easier to compact properly than a thick pile of gravel pretending to be solid.
Rake the base material evenly, lightly mist it with water if recommended, and compact it with a plate compactor. Repeat until you reach the planned depth. Check your slope as you work. The compacted base should follow the finished grade of the walkway.
This is the most important part of installing a paver walkway. If the base is uneven, the pavers will be uneven. If the base is too shallow, the walkway may settle. If the base is poorly compacted, the pavers may shift. Decorative pavers are the visible star, but the compacted base is the stage crew making the whole show possible.
Step 7: Install Edge Restraints
Edge restraints keep the pavers from spreading sideways over time. Without them, your neat walkway can slowly drift outward like it has retirement plans. Plastic, metal, concrete, stone, or paver soldier-course borders can all work, depending on the design.
Install edging along the sides of the walkway according to the manufacturer’s directions. Many flexible paver edging systems are secured with landscape spikes driven into the compacted base. For curves, choose edging that bends cleanly or can be cut to follow the shape.
Some installers place edge restraints before the bedding sand and pavers, while others install or tighten them after pavers are laid. The main point is that the final edge must be snug, stable, and properly anchored.
Step 8: Add and Screed the Bedding Sand
The bedding layer helps you set the pavers evenly. Spread about 1 inch of concrete sand or leveling sand over the compacted base. Do not use a thick layer of sand to fix a bad base. Sand is for fine leveling, not structural therapy.
Place two 1-inch pipes or conduits parallel to each other on the base. Pour sand between and around them. Pull a straight 2×4 across the pipes to screed the sand smooth. After screeding, carefully remove the pipes and fill the grooves with sand.
Work in small sections so you do not disturb the sand bed. Avoid walking on freshly screeded sand. If you must step into the area, use a board to spread your weight.
Step 9: Lay the Pavers
Start laying pavers from a straight edge, such as the house, driveway, porch, or a tightly pulled string line. Place the pavers gently onto the sand. Do not drag them across the surface, because that can disturb the bedding layer.
Keep the joints consistent. Many concrete pavers include small spacer tabs, but you still need to watch the pattern. Every few feet, check your lines with string or a straightedge. Small errors are easy to correct early and annoying to fix later.
Popular Paver Patterns
- Running bond: Simple, classic, and beginner-friendly.
- Herringbone: Strong interlock and a polished look, but more cuts.
- Basket weave: Traditional and attractive for brick-style pavers.
- Stacked bond: Clean and modern, though it requires careful alignment.
- Random pattern: Natural-looking, great for stone-style pavers.
Use a rubber mallet to tap individual pavers into place when needed. Do not pound aggressively. If a paver sits too high or too low, lift it, adjust the sand underneath, and reset it.
Step 10: Cut Pavers to Fit
Most walkways require at least a few cuts, especially around curves, steps, posts, or borders. Mark cut lines with a pencil or chalk. Use a masonry saw, wet saw, paver splitter, or angle grinder with a diamond blade, depending on the material and number of cuts.
Always wear eye protection, hearing protection, gloves, and a dust mask or respirator when cutting pavers. Silica dust is not something to casually invite into your lungs. Cut outdoors, follow tool instructions, and keep bystanders away from the work area.
Step 11: Compact the Pavers
After all pavers are laid and edge restraints are secure, compact the surface. A plate compactor helps settle the pavers into the bedding sand and locks the surface together. For textured or delicate pavers, use a protective pad on the compactor or follow the paver manufacturer’s instructions.
Compact from the outside inward and make multiple passes. The surface should feel firm and even. If a paver rocks, lift it and correct the sand underneath before continuing.
Step 12: Fill the Joints with Sand
Sweep polymeric sand or jointing sand across the paver surface so it falls into the joints. Work diagonally across the pattern to help the sand settle fully. Tap or compact the pavers as directed so the sand drops deeper into the joints, then sweep in more sand until the joints are properly filled.
For polymeric sand, the surface must be dry before application. Many products also require temperatures above a certain minimum and no rain in the forecast for at least 24 hours. Fill joints to the recommended height, often slightly below the paver bevel. Remove every bit of excess sand from the paver surface before misting. If polymeric sand hardens on top of the pavers, your beautiful walkway may look like it has dandruff with commitment issues.
Mist the surface gently according to product instructions. Do not blast the joints with a hose. The goal is to activate the binder, not create a tiny sand-based flash flood.
Step 13: Finish the Edges and Clean Up
Backfill along the walkway edges with soil, sod, mulch, or decorative gravel. This hides the edging and gives the path a finished look. Sweep the walkway clean and inspect the surface for low spots, uneven pavers, or loose joints.
If the walkway connects to stairs, a driveway, porch, or patio, make sure transitions are smooth and safe. Avoid trip edges. A walkway should guide people gracefully, not test their reflexes.
Common Paver Walkway Mistakes to Avoid
Skipping the Base
The base is not optional. A walkway built on thin sand over bare soil may look good for a short time, then settle unevenly after rain, foot traffic, or freeze-thaw movement.
Using Too Much Sand
A thick sand bed can shift and create waves in the paver surface. Keep the bedding layer thin and even. Correct major height problems in the compacted base, not with extra sand.
Ignoring Drainage
Water is patient, persistent, and rude. If your walkway slopes toward the house or holds puddles, you may end up with erosion, stains, ice hazards, or foundation concerns.
Forgetting Edge Restraints
Edge restraints keep the pavers locked in place. Without them, the outer pavers can creep outward, widening joints and weakening the pattern.
Rushing Polymeric Sand
Polymeric sand needs dry pavers, clean surfaces, proper joint depth, gentle watering, and curing time. Read the bag instructions carefully. This is not the moment for freestyle landscaping.
Maintenance Tips for a Long-Lasting Paver Walkway
Once your walkway is installed, maintenance is simple. Sweep it regularly to remove leaves, dirt, and seeds. Rinse stains promptly. Pull weeds while they are small. If joint sand washes out over time, refill it before pavers loosen.
In cold climates, use ice melt products that are safe for concrete pavers, and avoid aggressive metal shovels that can scratch the surface. If a section settles, lift the affected pavers, add or adjust bedding material, compact if needed, and reset the stones. That repair-friendly design is one of the biggest advantages of paver walkways.
Sealing is optional, but it can enhance color, reduce staining, and help protect against weathering. Wait until the pavers and joint sand have cured according to product instructions before applying sealer. Choose a breathable paver sealer and test it in a small area first.
Design Ideas for a Better-Looking Paver Path
A paver walkway can be purely practical, but it can also become a major design feature. For a traditional home, brick-style pavers in a running bond pattern can feel timeless. For a modern landscape, large-format concrete pavers with gravel joints create a clean, architectural look. For a cottage garden, tumbled pavers or natural stone shapes can soften the route.
Border pavers can frame the walkway and make the pattern look intentional. Contrasting colors help define the edge, while matching borders create a quieter design. Low-voltage path lights can improve nighttime safety and make the walkway glow like it knows it is the main character.
Plantings also matter. Soft grasses, lavender, boxwood, creeping thyme, hostas, or seasonal flowers can make the path feel integrated with the landscape instead of dropped onto the yard like a decorative landing strip.
Real-World Experience: What Installing a Paver Walkway Actually Feels Like
On paper, installing a paver walkway sounds beautifully organized: measure, excavate, compact, screed, lay, sand, admire. In real life, it usually includes a few extra steps, such as moving the same pile of gravel three times, discovering one mysterious tree root, and briefly becoming emotionally attached to your level.
The first big lesson from real DIY paver walkway projects is that layout deserves more time than most people give it. A walkway that looks good from one angle may feel odd when you actually walk it. Before digging, it helps to outline the path and use it for a day. Carry groceries along it. Walk from the driveway to the door. Pretend guests are arriving. If the route feels natural, you are probably on the right track. If you keep stepping outside the line, your feet are giving you free design advice.
The second lesson is that excavation always takes longer than expected. Grass comes up in clumps, soil changes texture, rocks appear from nowhere, and roots behave like they signed a long-term lease. A sharp shovel helps, but so does patience. Keeping the excavation depth consistent is worth the effort because every uneven spot below the base can echo upward into the finished walkway.
Compaction is another area where experience changes your opinion quickly. Many beginners think compacting once is enough. It usually is not. A plate compactor makes the base feel dramatically more solid after multiple passes. You can hear and feel the difference as the gravel tightens up. If the base still shifts underfoot, keep compacting. The pavers will only be as dependable as what is underneath them.
Screeding sand is oddly satisfying but unforgiving. The first few pulls with the 2×4 may leave ridges or low spots. That is normal. The trick is to use steady pressure, keep the board resting on the pipes, and avoid overworking the sand. Once the sand is smooth, treat it like fresh frosting on a cake. Do not walk through it. Do not kneel in it. Do not let the dog inspect it with enthusiasm.
Laying pavers is the fun part because the project finally starts looking like a walkway. Still, it pays to slow down. Check lines often. A tiny angle error in the first few rows can become a very obvious problem ten feet later. Keep a screwdriver or small pry bar nearby to adjust joints. Step back frequently and look across the entire pattern, not just the paver in your hand.
Cutting pavers can be intimidating, but careful measuring removes most of the drama. Mark each cut clearly, wear proper safety gear, and avoid rushing. If your path has curves, expect more cuts and more patience. Curves reward precision. They also expose shortcuts faster than straight lines do.
Polymeric sand is the final test of restraint. Sweep thoroughly, blow or brush every bit of dust from the surface, and water gently. Too much water can wash the sand out. Too little may fail to activate it properly. The best approach is to follow the product directions exactly, even if your inner weekend warrior insists it “basically understands sand.”
The best part comes after cleanup, when the walkway is finished and you walk across it for the first time without stepping on mud, mulch, or questionable lawn patches. A good paver walkway feels solid, looks intentional, and quietly upgrades the whole yard. It is hard work, yes, but it is also one of those projects where every step literally becomes part of the result.
Conclusion
Installing a paver walkway is a manageable DIY project when you respect the process. Plan the route carefully, excavate to the right depth, compact the soil and base thoroughly, screed a consistent bedding layer, lay the pavers with clean lines, restrain the edges, and finish the joints correctly. The visible beauty comes from the pavers, but the long-term success comes from the foundation below them.
A well-built paver walkway can improve curb appeal, guide foot traffic, reduce muddy areas, and add structure to your landscape. It is not the fastest outdoor project, but it is deeply rewarding. Plus, once it is finished, you get to point at it whenever someone visits and say, with suspicious casualness, “Oh, that walkway? I installed it.”
Note: This article is an original, publish-ready synthesis based on practical U.S. home improvement, hardscape installation, and manufacturer guidance for paver walkway projects.