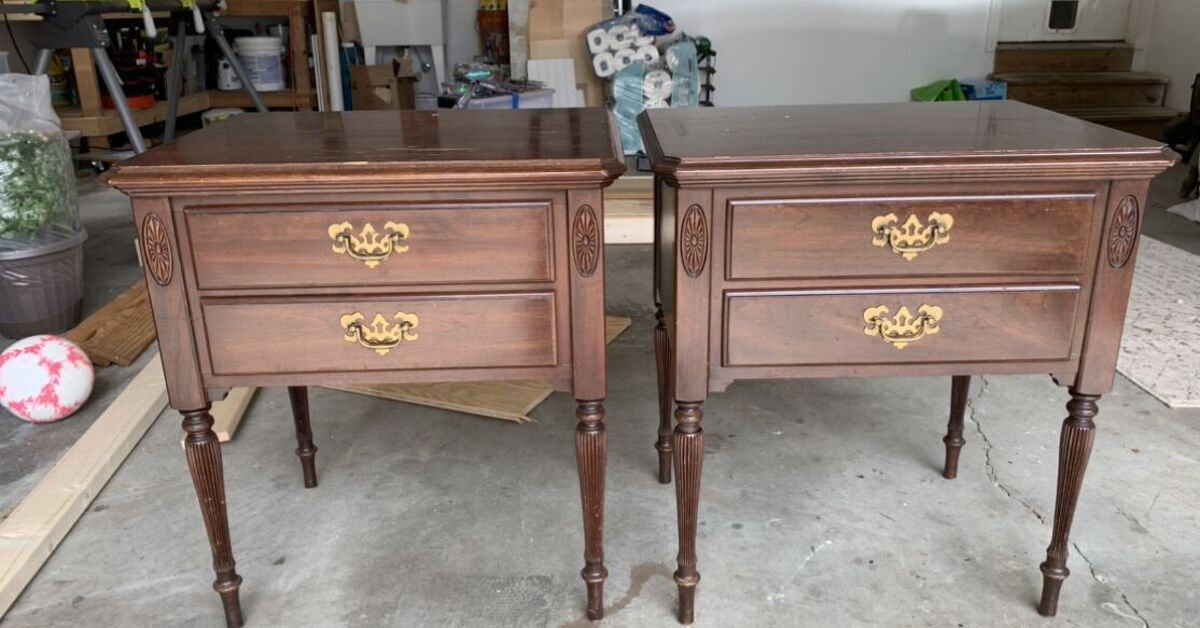
Vintage nightstands are the small-but-mighty heroes of bedroom furniture. They hold your lamp, your book, your phone, your midnight glass of water, and, if we are being honest, at least three mysterious receipts you keep meaning to throw away. The good news? Because nightstands are compact, practical, and usually less intimidating than a giant dresser, they are perfect candidates for a DIY furniture makeover.
Learning how to refinish vintage nightstands can turn a scratched, wobbly, outdated piece into a charming bedroom accent with real personality. Whether you found a pair at a flea market, inherited them from a relative, or rescued them from the curb before trash day could commit a crime against good wood, refinishing lets you preserve character while giving the piece a fresh life.
This guide walks through the full process: inspecting the piece, cleaning, repairing, sanding, staining, painting, sealing, updating hardware, and avoiding common mistakes. It also includes real-world experience tips at the end, because furniture refinishing is one of those hobbies where the project teaches you things no perfectly lit tutorial ever mentions.
Why Vintage Nightstands Are Worth Refinishing
Vintage nightstands often have better bones than many modern flat-pack pieces. Solid wood drawers, dovetail joints, carved legs, real veneer, and original hardware can make even a beat-up nightstand worth saving. A little sanding and stain can reveal beautiful grain hiding under old varnish. A smart paint color can bring a dated shape into the present. New knobs can make the whole piece look like it suddenly got a raise.
Refinishing is also budget-friendly. Instead of buying new bedroom furniture, you can spend a weekend and a modest supply list creating something custom. It is also sustainable. Every refinished nightstand is one less piece in a landfill and one more piece with a story. That is design with a conscienceand possibly with old gum stuck under a drawer, but we will deal with that later.
Before You Start: Inspect the Nightstand Like a Detective
Before grabbing sandpaper, look closely at the nightstand. This step saves time, money, and the emotional damage of discovering halfway through that the “solid walnut” piece is actually particle board wearing a very convincing costume.
Check the Construction
Open the drawers. Do they slide smoothly? Are the joints tight? Are the legs stable? A vintage nightstand with solid wood construction is usually easier to refinish than one made entirely from laminate or swollen particle board. Veneer pieces can still be refinished, but they require a lighter touch because aggressive sanding can burn through the thin wood layer.
Look for Water Damage
Nightstands live dangerous lives. Water rings, candle wax, lotion spills, and coffee stains are common. Light marks may sand out or disappear under a darker stain. Deep water damage, bubbling veneer, or black stains may require patching, painting, or creative camouflage.
Consider Lead Paint Safety
If the nightstand has old paint and could date from before 1978, do not sand it casually. Older paint may contain lead, and sanding can create hazardous dust. Use a lead test kit, follow safe work practices, or consult a professional if you suspect lead-based paint. This is not the glamorous part of refinishing, but neither is explaining to your lungs why you treated them like a shop vacuum.
Tools and Supplies You May Need
You do not need a professional workshop to refinish vintage nightstands, but having the right supplies makes the process much smoother. A basic list includes:
- Drop cloth or plastic sheeting
- Gloves, eye protection, and a mask or respirator
- Mild dish soap or wood-safe cleaner
- Microfiber cloths and tack cloth
- Screwdriver for removing hardware
- Wood filler or putty
- Sandpaper in several grits, such as 120, 180, and 220
- Orbital sander for flat surfaces, if appropriate
- Primer, paint, stain, or wood conditioner
- Brushes, foam rollers, or lint-free rags
- Polyurethane, polycrylic, wax, or another protective topcoat
- New knobs or pulls, if updating hardware
For a simple painted nightstand, you may only need cleaner, sandpaper, primer, paint, and a topcoat. For a stained wood finish, you will want stain, wood conditioner if the wood is blotch-prone, and a durable sealer.
Step-by-Step Guide to Refinish Vintage Nightstands
Step 1: Remove Drawers and Hardware
Start by taking out the drawers and removing knobs, pulls, hinges, or decorative plates. Put screws and hardware in a labeled bag so they do not disappear into the same universe as missing socks. If the original hardware is attractive, clean and reuse it. If it is bent, corroded, or just painfully ugly, replacing it can instantly modernize the nightstand.
Step 2: Clean Thoroughly
Never sand dirt into wood. Clean the nightstand first with a mild soap-and-water solution or a wood-safe cleaner. Use a damp, not soaking wet, cloth. Wipe away grime, oils, dust, and polish buildup. Dry the piece completely before moving on.
This step may seem boring, but it is where many refinishing projects secretly succeed or fail. Paint and stain adhere better to a clean surface. Think of cleaning as the polite handshake before the makeover begins.
Step 3: Make Repairs
Tighten loose screws. Glue wobbly joints. Fill small dents, scratches, nail holes, or missing veneer spots with wood filler. Once the filler dries, sand it smooth. For deeper veneer problems, you may need to glue down lifted edges, clamp them, or patch missing areas.
If the drawer slides are sticky, rub them with paraffin wax or replace worn runners. A nightstand should not sound like a haunted attic every time you open the drawer.
Step 4: Decide Whether to Paint, Stain, or Restore
Your finish choice depends on the condition of the piece and the look you want.
Choose stain if the wood grain is attractive and the surface can be sanded evenly. Stain gives a classic, warm look and works beautifully on oak, walnut, mahogany, and maple.
Choose paint if the wood is damaged, mismatched, heavily repaired, or made from mixed materials. Paint is also great for creating cottage, modern, coastal, farmhouse, or vintage-inspired looks.
Choose restoration if the original finish is mostly intact. Sometimes cleaning, light scuff sanding, touch-up stain, and a fresh topcoat are enough. Not every vintage piece needs to be stripped down to bare wood. Sometimes it just needs a spa day.
Step 5: Sand with Patience
Sanding smooths the surface, removes damaged finish, and helps new stain or paint adhere. Start with a medium grit such as 120 if the finish is rough, then move to 180 and 220 for a smoother surface. Always sand with the grain when working by hand.
Use an orbital sander only on flat, sturdy areas, and avoid pressing too hard. On edges, curves, veneer, carved details, and corners, sand by hand. Over-sanding vintage veneer is a common mistake. Once you sand through veneer, there is no magic undo buttononly regret and possibly paint.
Step 6: Remove Sanding Dust
After sanding, wipe the piece with a tack cloth or a slightly damp microfiber cloth. Dust left behind can ruin paint, muddy stain, and create a gritty finish. This is also the moment to vacuum your workspace. Tiny dust particles are dramatic. They will leap into wet topcoat like they were invited.
Step 7: Prime if Painting
If you are painting your vintage nightstand, primer helps create a smooth base and improves adhesion. It is especially useful on bare wood, glossy surfaces, laminate, dark wood, or pieces with stains that may bleed through paint.
Apply primer in thin coats. Let it dry according to the product instructions, then lightly sand with 220-grit sandpaper before painting. This creates a smoother finish and helps the paint look intentional rather than “I panicked in the garage at midnight.”
Step 8: Apply Paint or Stain
For paint, apply thin, even coats with a quality brush or foam roller. Two or three thin coats usually look better and last longer than one thick coat. Let each coat dry fully before adding the next. If using chalk-style paint, remember that it often needs wax or a clear protective coat for durability.
For stain, consider using a pre-stain wood conditioner on woods like pine, birch, maple, or other species prone to blotching. Apply stain with a brush or rag, let it penetrate briefly, then wipe off the excess with the grain. If you want a deeper color, apply another coat after the first has dried.
Step 9: Seal the Finish
A nightstand needs protection because it handles daily abuse: water glasses, lamps, books, phone chargers, and whatever snack crumbs you deny eating in bed. A topcoat protects the surface and makes cleaning easier.
For painted furniture, water-based polycrylic is popular because it dries clear and resists yellowing. For stained wood, polyurethane offers a durable finish in matte, satin, semi-gloss, or gloss. Wax can create a soft vintage look, but it is less protective than a film finish and may need reapplication.
Apply topcoat in thin layers. Sand lightly between coats if the product recommends it. Let the final coat cure before heavy use. Dry to the touch does not always mean fully cured. Furniture finishes can be sneaky like that.
Design Ideas for Refinished Vintage Nightstands
Classic Stained Wood
A walnut, espresso, or medium oak stain works well if the nightstand has attractive grain. Pair it with brass hardware for a timeless look. This style is ideal for traditional, transitional, and mid-century bedrooms.
Painted Body with Stained Top
This two-tone approach is excellent for pieces with a good wood top but damaged sides. Paint the base in soft white, navy, sage green, charcoal, or warm gray, then stain and seal the top. It adds contrast while keeping some vintage warmth.
Modern Matte Black
Black paint can make ornate vintage nightstands feel surprisingly modern. Add simple brass or matte black hardware for a boutique-hotel look. Just remember: dark paint reveals dust, so keep a microfiber cloth nearby unless you enjoy living with visible evidence of gravity.
Soft Cottage Color
Muted blues, creamy whites, dusty greens, and pale taupes are great for cottage, farmhouse, coastal, or shabby-chic rooms. Light distressing on edges can highlight carved details, but do not overdo it unless you want the piece to look like it survived a pirate raid.
Common Mistakes to Avoid
Skipping Prep Work
Paint does not hide poor prep. It announces it. Grease, dust, old wax, and glossy varnish can cause peeling, streaking, and uneven coverage. Clean, sand, and prime when needed.
Using Too Much Product
Thick coats of stain, paint, or topcoat dry slowly and can leave drips, brush marks, and gummy areas. Thin coats are your friend. Furniture refinishing rewards patience, which is unfair but true.
Ignoring the Drawers
The exterior may get all the attention, but drawers matter. Clean the interiors, repair loose bottoms, and consider lining them with peel-and-stick wallpaper or drawer liner. It is a small touch that makes the finished piece feel polished.
Not Testing First
Always test stain, paint, or topcoat in a hidden area. Wood species, previous finishes, and old repairs can affect the final color. A stain that looks rich and elegant on the can may turn orange on your nightstand and suddenly your bedroom has pumpkin spice furniture.
How to Style Your Refinished Nightstands
Once the finish has cured, bring the nightstands back into the bedroom and style them simply. A lamp, a small tray, a book, and a plant or framed photo are enough. If the nightstands are ornate, keep accessories clean and minimal. If the nightstands are simple, use textureceramic lamps, woven baskets, linen shades, or metal accentsto add interest.
Matching nightstands create a balanced look, but they do not have to be identical. Two vintage pieces can work together if they share a color, finish, height, or hardware style. Refinishing mismatched pieces in the same paint color is one of the easiest ways to make them look intentional.
Care Tips After Refinishing
Protect the new finish with coasters, felt pads, and gentle cleaning. Avoid harsh chemical cleaners, ammonia-based sprays, and soaking wet cloths. Dust regularly with a microfiber cloth. For water-based topcoats, give the finish time to cure fully before placing heavy objects or hot mugs on the surface.
If the top receives daily use, consider adding a small glass top, decorative tray, or washable mat. A refinished vintage nightstand should be used and enjoyed, not treated like a museum artifact. Still, maybe do not place a sweating iced coffee directly on it five minutes after congratulating yourself.
Extra Experience Notes: What Refinishing Vintage Nightstands Really Teaches You
After working on vintage nightstands, one lesson becomes clear fast: small furniture is not automatically easy furniture. Nightstands are compact, yes, but they are full of corners, drawer fronts, edges, legs, grooves, hardware holes, and surprise repairs. A flat tabletop may take ten minutes to sand. A carved leg can take half an hour and a small conversation with your own patience.
The first practical experience is that cleaning matters more than beginners expect. Old nightstands often carry decades of furniture polish, skin oils, candle soot, dust, and mystery residue. At first glance, the finish may look simply dull. After cleaning, you may discover the wood is better than expectedor that the “dark stain” was mostly old grime having a long career. A gentle cleaning before sanding can change the whole plan.
The second lesson is that vintage veneer deserves respect. Many beautiful mid-century and traditional nightstands have veneer tops or drawer fronts. Veneer is not bad; in fact, it can be high quality and very attractive. The problem comes when someone attacks it with a power sander like they are leveling a driveway. Light pressure, fine grit, and frequent checking are essential. If the veneer is thin, painting may be the smarter and prettier choice.
Another real-world tip: hardware can transform the piece more than expected. Original brass pulls may look hopeless when removed, but a good cleaning can reveal warm metal underneath. On the other hand, replacing clunky hardware with simple knobs can make a dated nightstand feel current. Before drilling new holes, test the hardware placement with painter’s tape. Crooked hardware is small, but once you notice it, it becomes the only thing your eyes can see.
Color choice is another area where experience helps. A paint swatch that looks soft white in the store can look cold blue in a bedroom. A stain that looks medium brown online can turn red-orange on certain wood. Always test. Bedroom lighting is especially tricky because lamps create warm pools of light, while daylight may reveal undertones you did not notice. If refinishing a pair, test both pieces. Vintage twins do not always age the same way.
Dry time is also not the same as cure time. Many beginners move a refinished nightstand back into place too soon, then set a lamp or alarm clock on it and later find faint marks in the finish. Letting the topcoat cure properly is the difference between a nice makeover and a surface that collects dents like souvenirs.
Finally, refinishing vintage nightstands teaches you to embrace imperfection. A tiny nick on the side, a slightly uneven grain pattern, or a drawer that has its own personality does not ruin the piece. It proves the nightstand had a life before your bedroom. The goal is not to erase every sign of age. The goal is to make the piece sturdy, beautiful, useful, and ready for its next chapter. That is the charm of vintage furniture: it does not need to be flawless to be fantastic.
Conclusion
Refinishing vintage nightstands is one of the most satisfying DIY furniture projects because the results are useful, visible, and personal. With careful cleaning, smart repairs, patient sanding, the right finish, and a protective topcoat, an old nightstand can become a bedroom highlight instead of a dusty afterthought.
The best approach depends on the piece. Beautiful wood may deserve stain and clear sealer. Damaged or mixed-material furniture may shine with paint. Original hardware may be worth saving, while new knobs can refresh the whole design. Above all, take your time. A vintage nightstand has already waited decades for its comeback. It can wait one more afternoon for the topcoat to dry.