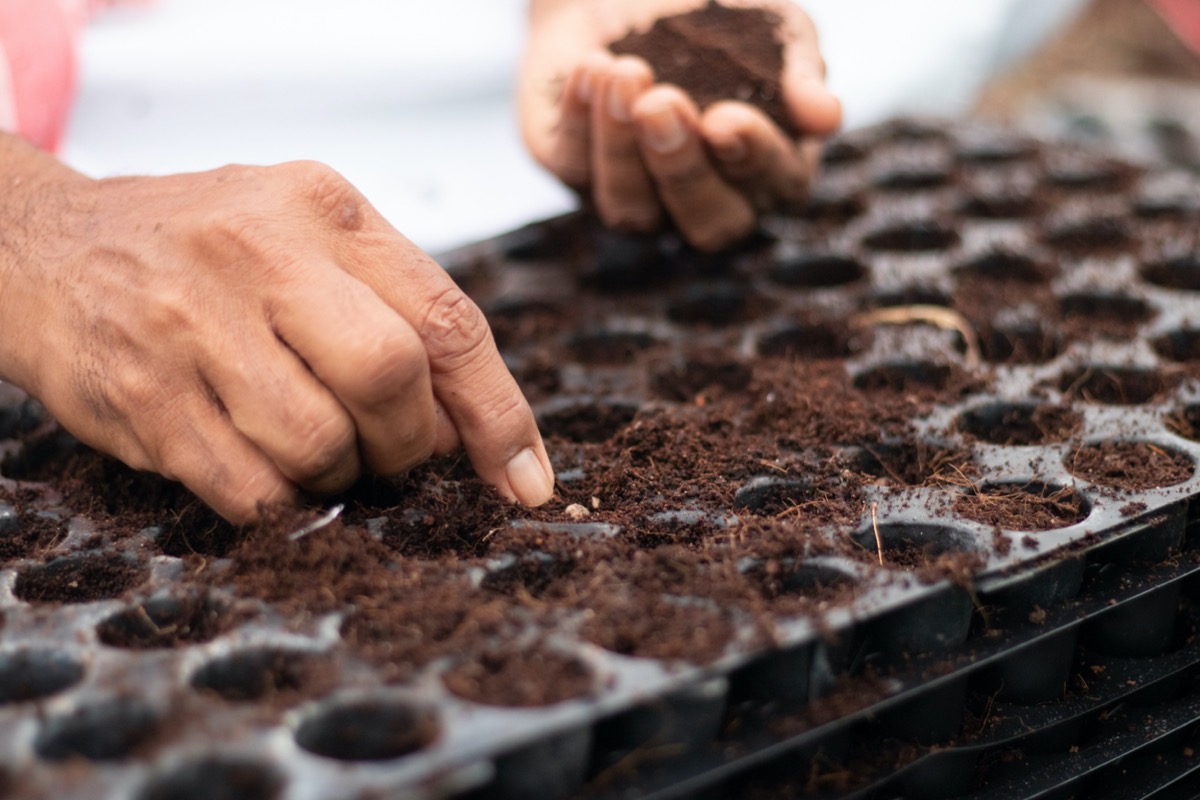
Starting seeds indoors is one of those gardening habits that feels a little magical and a little suspicious the first time you try it. You put a tiny speck into a tray of fluffy mix, give it light, warmth, and water, and suddenly you are the proud caretaker of baby tomatoes, basil, peppers, marigolds, lettuce, or zinnias. It is basically a nursery, except the babies have roots and do not need college funds.
But successful indoor seed starting is not about luck. It is about setting up the right environment before the seeds ever touch the soil. Seeds need a clean growing medium, dependable moisture, enough warmth, strong light, and containers that allow roots to develop without sitting in a swamp. Skip one of those pieces and you may end up with leggy seedlings, moldy trays, poor germination, or mystery sprouts because you forgot to label anything. We have all met the “I think this is a pepper?” plant.
This guide covers the 8 essential tools and materials for starting seeds indoors, with practical tips for beginners and experienced gardeners who want stronger, healthier transplants. Whether you are growing vegetables, herbs, flowers, or a little windowsill jungle, these supplies will help you start seeds indoors with confidence.
Why Start Seeds Indoors?
Starting seeds indoors gives your garden a head start before outdoor conditions are warm enough for planting. This is especially useful for crops with long growing seasons, such as tomatoes, peppers, eggplants, onions, broccoli, cabbage, herbs, and many annual flowers. By the time the last frost date passes, your seedlings are already several weeks old and ready to move into the garden after proper hardening off.
Indoor seed starting also opens the door to more variety. Garden centers may carry a few tomato or pepper plants, but seed catalogs offer dozens or even hundreds of options. Want purple basil, striped tomatoes, lemon cucumbers, dwarf sunflowers, or a pepper with a name that sounds like a tiny dragon? Seeds make that possible.
The best part is that seed starting does not require a fancy greenhouse. A simple setup with clean trays, seed-starting mix, lights, warmth, labels, and careful watering can produce excellent seedlings at home.
1. High-Quality Seeds
Seeds are the foundation of the entire project, so start with fresh, reliable seed from a trusted source. Old seeds may still sprout, but germination rates often decline over time. Some seeds remain viable for several years when stored properly, while others lose strength much faster. If you are using leftover packets, do a quick germination test with a damp paper towel before dedicating tray space to them.
What to Look for on Seed Packets
A good seed packet is more than a pretty envelope. It usually includes planting depth, spacing, days to germination, days to maturity, light requirements, and whether the plant should be started indoors or direct-sown outdoors. Pay attention to the “start indoors” timing, which is often listed as a number of weeks before your average last frost date.
For example, tomatoes are commonly started indoors several weeks before transplanting, while crops like carrots and radishes are usually direct-sown because they dislike root disturbance. Large-seeded cucurbits such as squash, melons, and cucumbers can be started indoors, but they grow quickly and do not enjoy being root-bound, so timing matters.
Pro Tip
Do not start everything on the same weekend unless your dream is to own a seedling traffic jam. Cool-season crops, warm-season crops, herbs, and flowers all have different ideal schedules. Use a calendar and work backward from your local frost date.
2. Sterile Seed-Starting Mix
A proper seed-starting mix is one of the most important materials for starting seeds indoors. Do not use garden soil from the backyard. It can be heavy, compact easily in small containers, drain poorly, and may contain weed seeds, insects, or disease organisms. Baby seedlings are dramatic enough without moving into contaminated real estate.
Seed-starting mixes are usually soilless and lightweight. They may contain peat moss, coconut coir, vermiculite, perlite, or similar materials that hold moisture while still allowing air to reach the roots. The ideal mix is fine-textured, loose, evenly moist, and clean.
Seed-Starting Mix vs. Potting Soil
Seed-starting mix is designed for germination. It is finer and lighter than many potting soils, making it easier for tiny roots to push through. Potting soil can work for larger seedlings or potting up, but some blends are too chunky for small seeds. If the mix contains large bark pieces, sticks, or clumps, save it for bigger containers.
How to Prepare the Mix
Before filling trays, moisten the seed-starting mix in a bucket or tub. The goal is damp, not dripping. When squeezed, it should hold together lightly but not release a stream of water. Pre-moistening helps prevent dry pockets and keeps tiny seeds from floating away when watered after planting.
3. Seed Trays, Cell Packs, or Small Containers With Drainage
Seedlings need containers that support root growth and drain well. Seed trays with individual cells are popular because each seedling gets its own little apartment. This helps prevent tangled roots and makes transplanting easier. You can also use small pots, plug trays, soil blocks, or recycled containers, as long as they are clean and have drainage holes.
Why Drainage Matters
Seeds need moisture to germinate, but soggy conditions invite trouble. Poor drainage can lead to damping-off disease, weak roots, algae, fungus gnats, and sad seedlings that collapse like they just received bad news. Always use containers with holes in the bottom and place them in a shallow tray to catch excess water.
Recycled Container Ideas
Yogurt cups, takeout containers, egg cartons, and milk carton bottoms can work if you wash them well and add drainage holes. Reusing containers saves money, but sanitation matters. Clean old pots and trays before planting, especially if they held diseased plants in the past.
Choosing the Right Size
Small cells are efficient for germination, but fast-growing seedlings may need to be moved into larger pots later. Tomatoes, peppers, eggplants, and many flowers often benefit from being “potted up” once they develop true leaves. Bigger roots make stronger transplants.
4. Plant Labels and a Waterproof Marker
Plant labels are not glamorous, but they are essential. Many seedlings look nearly identical at first, especially tomatoes, peppers, brassicas, herbs, and flowers. Without labels, your seed-starting project turns into a botanical guessing game, and the garden will not reveal the answer until much later.
Use plastic plant tags, wooden craft sticks, masking tape on tray edges, or reusable labels. Write the plant name, variety, and sowing date. The sowing date helps you track germination speed and know when seedlings are ready for potting up or transplanting.
What to Include on Labels
- Crop name, such as tomato, basil, broccoli, or marigold
- Variety name, such as ‘Brandywine’ or ‘Genovese’
- Sowing date
- Expected germination time, if helpful
- Special notes, such as “needs light” or “heat mat”
A waterproof marker is worth it. Regular ink fades, smears, and vanishes exactly when you need it most. Garden labels have a sense of humor, and it is not a kind one.
5. Grow Lights
Grow lights are the secret weapon of indoor seed starting. A sunny window may look bright to human eyes, but seedlings often need more consistent light than a windowsill can provide. Without enough light, seedlings stretch toward the nearest source and become tall, thin, pale, and floppy. This is called “leggy” growth, and it is the seedling version of skipping core day.
LED shop lights, fluorescent lights, or dedicated grow lights can all work. The key is keeping the light close enough to the seedlings and leaving it on long enough each day. Many indoor seed-starting setups use 12 to 16 hours of light daily, depending on the crop and fixture.
How Close Should Grow Lights Be?
In many home setups, lights are kept just a few inches above the seedling tops and raised as the plants grow. If lights are too far away, seedlings stretch. If they are too close and hot, leaves may dry or burn. Adjustable chains, shelves, or a simple hanging system make this easier.
What Kind of Light Is Best?
Full-spectrum LED lights are widely available, energy efficient, and suitable for seed starting. You do not need the most expensive commercial greenhouse fixture. A basic LED shop light can grow sturdy seedlings if it provides enough brightness and is positioned correctly.
6. Timer, Heat Mat, and Thermometer
A timer is one of the cheapest ways to make your seed-starting setup more reliable. Plug your grow lights into a timer so seedlings receive consistent daily light without depending on your memory. Human memory is wonderful, but it is also the reason some seedlings accidentally experience a 36-hour day followed by three days of darkness.
A heat mat is another useful tool, especially for warm-season crops like tomatoes, peppers, eggplants, and basil. Many seeds germinate best when the growing medium is warm. The important word is “medium,” not just air. A room may feel comfortable to you while the seed tray sitting on a cold shelf remains too chilly for quick germination.
When to Use a Heat Mat
Use a seedling heat mat during germination, then remove it or turn it off after most seeds sprout. Continued high heat after germination can encourage weak, stretched growth. Seedlings usually prefer slightly cooler conditions once they are up and growing.
Why a Thermometer Helps
A simple soil thermometer or probe thermometer helps you know what is actually happening in the seed tray. Guessing temperature is like guessing cake doneness by vibes. Sometimes it works, but the thermometer is better.
7. Humidity Dome, Spray Bottle, and Bottom-Watering Tray
Seeds need steady moisture to begin germination. Once they absorb water and the germination process starts, drying out can kill the embryo. A humidity dome, plastic cover, or loose plastic wrap helps keep the surface moist until seeds sprout. Remove the cover once seedlings emerge to improve airflow and reduce disease risk.
A spray bottle is useful for misting the surface after sowing tiny seeds. It keeps the mix moist without blasting seeds into the next cell. For larger seedlings, bottom watering is often better. Add water to the tray beneath the cells and let the mix absorb moisture from below. After the surface becomes moist, dump out any excess water so roots are not sitting in a puddle.
How Moist Is Moist?
The seed-starting mix should feel like a wrung-out sponge. Too dry, and germination suffers. Too wet, and roots struggle for oxygen. The balance is steady moisture, not swamp conditions. If algae starts growing on the surface, the setup is probably too wet, too still, or both.
8. Fan and Gentle Fertilizer
Once seedlings germinate, they need more than light and water. They also benefit from gentle air movement. A small fan set on low can improve airflow, reduce excess humidity, and help seedlings develop stronger stems. Do not aim a fan at them like a hurricane simulator. A soft breeze is enough.
Fertilizer becomes useful after seedlings develop true leaves. The first leaves that appear are seed leaves, called cotyledons. True leaves come next and look more like the mature plant. At that stage, seedlings may benefit from a diluted, balanced liquid fertilizer if the growing mix contains little or no nutrition.
How Much Fertilizer Should You Use?
Start lightly. Many gardeners use diluted liquid fertilizer at a weaker rate than the label suggests for mature plants. Overfertilizing young seedlings can damage roots and cause lush, weak growth. Think of fertilizer as seasoning, not soup.
How to Set Up Your Indoor Seed-Starting Station
Once you have the eight essentials, arrange them into a simple workflow. Place trays on a sturdy shelf, table, or rack. Hang grow lights above the trays and connect them to a timer. Keep your seed-starting mix, labels, marker, spray bottle, and seed packets nearby. If using a heat mat, place it under the tray during germination and monitor the temperature.
Fill containers with pre-moistened seed-starting mix, sow seeds at the recommended depth, label immediately, cover lightly if needed, and place the tray in a warm spot. After germination, remove the humidity dome, move seedlings under bright light, and keep the lights close to the foliage.
Common Seed-Starting Mistakes to Avoid
Starting Too Early
Starting seeds too early is tempting, especially in late winter when gardeners are emotionally vulnerable and seed catalogs are whispering sweet nonsense. But oversized, root-bound seedlings are harder to manage and may suffer transplant shock. Follow the timing on seed packets and your regional planting calendar.
Using Weak Light
Leggy seedlings usually mean they need stronger or closer light. A bright window may work for a few plants, but grow lights produce more consistent results for most indoor seed-starting projects.
Overwatering
Overwatering is one of the quickest ways to ruin seedlings. Keep the mix evenly moist but not saturated. Let air reach the roots. Empty standing water from trays after bottom watering.
Forgetting to Harden Off Seedlings
Indoor seedlings need time to adjust before living outside full-time. Gradually expose them to outdoor light, wind, and temperature changes over several days. This process, called hardening off, helps prevent sunscald, wilting, and shock.
Extra Experience: Practical Lessons From Starting Seeds Indoors
After you have started a few trays indoors, you begin to learn little lessons that no product label explains perfectly. The first lesson is that seedlings grow better when you prepare before planting day. Fill trays, moisten mix, test lights, check the timer, and write labels before opening seed packets. Once the seeds come out, tiny chaos begins. A packet tips over, the phone rings, the dog investigates, and suddenly you are trying to remember whether the left side of the tray is basil or broccoli. Label first, celebrate later.
Another useful experience is learning how heavy a properly watered tray feels. At first, many beginners water by schedule, such as every morning. That can lead to overwatering because seedlings do not use the same amount of water every day. A tray under bright lights in a warm room dries faster than a covered tray during germination. Lift the tray gently. If it feels surprisingly light and the mix surface is pale, it may need water. If it feels heavy and the surface is dark and damp, wait.
Airflow also matters more than beginners expect. A small fan can make a big difference in preventing stagnant, humid conditions. It also encourages seedlings to grow stockier stems. In nature, plants experience breezes. Indoors, without movement, they can become soft and delicate. The goal is not to punish them with wind. The goal is to remind them that the outside world exists.
Light distance is another hands-on lesson. Seedlings tell you quickly when the light is wrong. If they stretch and lean, move the light closer or increase brightness. If leaf edges dry or curl near a hot fixture, raise the light slightly. Adjustable lighting is far easier than balancing seed trays on stacks of old cookbooks, although many gardeners have absolutely done that.
Finally, do not judge your entire gardening future by one tray. Some seeds are naturally slow. Some varieties are fussy. Some packets are old. Sometimes one cell fails for no obvious reason while the cell beside it grows like it signed a sponsorship deal. Keep notes. Write down sowing dates, germination times, light setup, and what worked. Next season, those notes become your personal seed-starting playbook.
The best indoor seed-starting setup is not always the most expensive one. It is the one you can manage consistently. Clean containers, fresh seeds, sterile mix, strong light, steady moisture, mild warmth, airflow, and labels will take you a long way. Add patience, observation, and a sense of humor, and you are officially dangerous in the best gardening way.
Conclusion
Starting seeds indoors is one of the most rewarding ways to begin a garden. With the right tools and materials, you can grow sturdy transplants, save money, explore more varieties, and enjoy gardening weeks before outdoor planting begins. The essentials are simple: quality seeds, clean seed-starting mix, containers with drainage, labels, grow lights, a timer and heat support, moisture tools, airflow, and gentle nutrition.
Think of your indoor seed-starting station as a tiny training camp. Your job is to give seeds the conditions they need to wake up, grow strong, and prepare for life outdoors. Keep the mix moist but not soggy, provide bright light, maintain comfortable temperatures, label everything, and do not rush the process. Do that, and your seedlings will be ready to march into the garden like leafy little champions.
Note: This article is written in original American English for web publishing and is based on established seed-starting practices recommended by U.S. horticulture and Cooperative Extension resources.