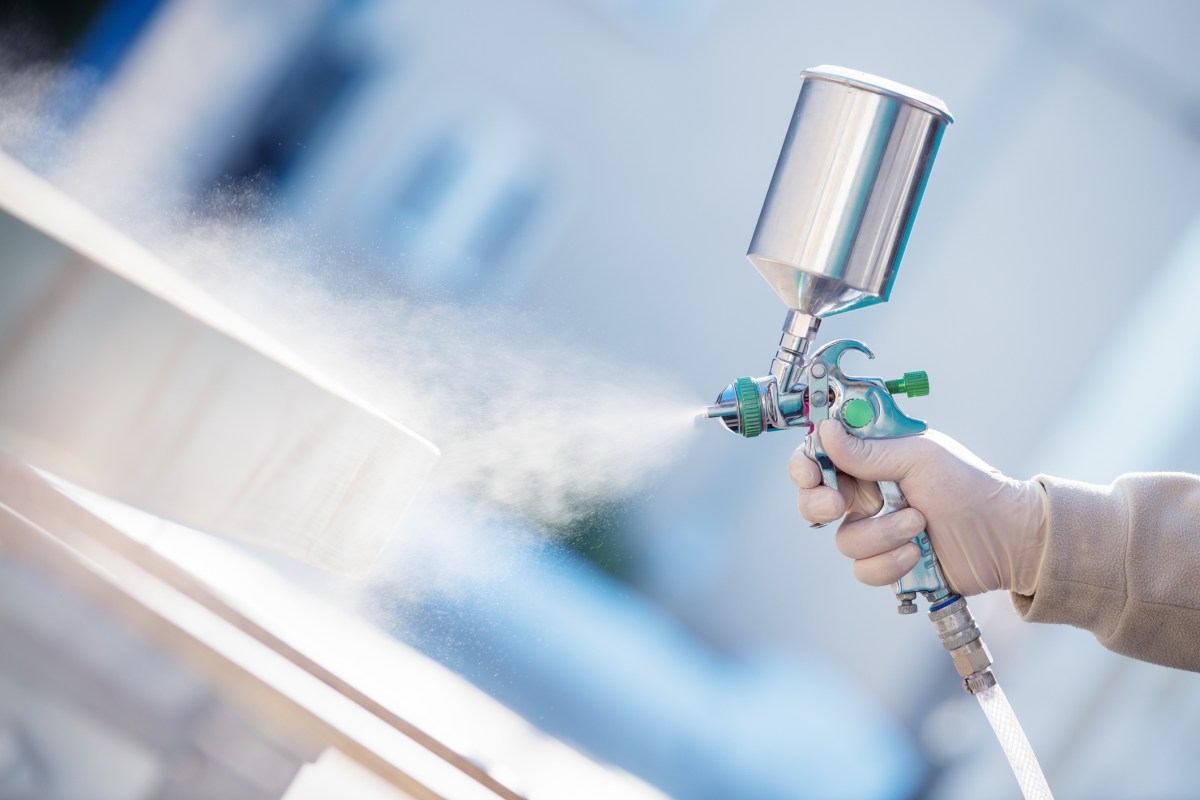
Paint sprayers promise the DIY dream: smooth coverage, noold. Then reality arrives wearing an overspray cloud. The cabinet doors develop drips, the wall looks striped, and a suspicious mist has somehow reached an object located three rooms away.
The problem usually is not the sprayer itself. Most disappointing results come from a handful of preventable paint sprayer mistakes involving surface preparation, equipment setup, spray technique, coat thickness, and cleanup. A sprayer can apply paint quickly, but it also magnifies small errors quickly. Think of it as a very efficient employee who follows bad instructions with tremendous enthusiasm.
Whether you are using an airless sprayer for walls and siding, an HVLP sprayer for cabinets and furniture, or a handheld unit for smaller projects, the following six mistakes can stand between you and a flawless paint finish.
Before You Spray: Understand the Tool and the Job
Not every paint sprayer is designed for every coating or surface. Airless sprayers move a relatively large amount of material and are commonly used for walls, ceilings, fences, decks, and exterior siding. HVLP equipment delivers paint at lower pressure with greater control, making it useful for trim, doors, cabinets, and furniture. Pneumatic systems can produce excellent fine finishes but require a suitable compressor and careful adjustment. filling the reservoir, read both the sprayer manual and the coating label. The manual identifies compatible materials, maximum tip sizes, pressure procedures, and cleaning requirements. The paint manufacturer may specify whether thinning is permitted, which spray-tip opening to use, and how long the coating must dry before recoating.
This matters because two cans that both say “interior paint” may behave very differently. One formula may be designed to spray at package consistency, while another may need limited conditioning for a particular HVLP system. Guessing can produce spitting, clogged tips, excessive overspray, weak coverage, or a finish with all the elegance of cottage cheese.
Mistake 1: Skipping Proper Surface Preparation
A sprayer does not hide dirt, grease, peeling paint, dents, or sanding scratches. It gives them a fresh coat and better lighting.
Why poor preparation ruins the finish
Paint bonds best to a clean, dry, stable, and appropriately dull surface. Dust can create gritty bumps. Grease may cause fisheyes or adhesion failure. Glossy finishes can prevent the new coating from gripping properly. Loose paint remains loose paint, even after it has been covered with an expensive color called something like “Metropolitan Whisper.”
Major paint manufacturers recommend removing contamination, scraping loose material, smoothing rough edges, and scuff-sanding glossy surfaces before application. Bare wood, repaired drywall, stained areas, metal, and other challenging substrates may also require a compatible primer. to prepare the surface correctly
Begin by removing hardware, outlet covers, handles, hinges, and anything else that should not become permanently color coordinated. Wash away grease and grime with a cleaner appropriate for the substrate. Rinse when required and allow the area to dry completely.
Scrape peeling paint, fill holes, repair cracks, and sand rough transitions. On previously glossy surfaces, scuff-sand evenly so the coating has a better mechanical bond. Vacuum the dust and finish with a lint-free cloth or another cleaning method approved for the paint system.
Prime bare or highly porous materials when recommended. Primer can improve adhesion, reduce uneven absorption, block stains, and create a more uniform base for the finish coat. Do not assume that “paint and primer in one” eliminates every priming situation; significant stains, raw substrates, major color changes, and adhesion-sensitive surfaces may still need a dedicated product.
Homes built before 1978 may contain lead-based paint. Sanding, scraping, or disturbing suspect coatings can create hazardous dust, so follow current EPA lead-safe guidance rather than attacking an old window frame with a power sander and optimism.
Mistake 2: Failing to Mask Against Overspray
New sprayer users often protect the immediate work surface and ignore everything else. Unfortunately, airborne paint particles have ambition. They can settle on flooring, windows, vehicles, landscaping, fixtures, furniture, and nearby rooms.
Overspray travels farther than expected
Overspray is influenced by pressure, tip size, spray distance, wind, ventilation, and coating viscosity. Excessive pressure or spraying too far from the surface can increase airborne material. Outdoors, even a modest breeze can redirect the spray fan. Indoors, poorly positioned fans may circulate mist instead of exhausting it.
Reliable project guides recommend covering floors and furniture, masking trim and fixtures, protecting adjacent surfaces, and providing appropriate ventilation before spraying begins. It is much faster to spend another 20 minutes masking than to spend an afternoon explaining why the family car now has a subtle eggshell texture. tter masking strategy
Remove movable items from the work area. Cover floors with drop cloths or secured protective material. Use painter’s tape with masking paper or plastic to protect windows, baseboards, doors, cabinets, lighting, vents, and electrical devices. Seal openings that could allow mist to enter adjoining rooms.
For exterior work, cover nearby windows, masonry, plants, outdoor furniture, and vehicles. Watch the wind throughout the project rather than checking it only once. Conditions can change during the day.
Wear suitable personal protective equipment, including eye protection, gloves, protective clothing, and respiratory protection appropriate for the coating and work environment. Maintain ventilation and eliminate ignition hazards when using products that produce flammable vapors. High-pressure airless equipment must never be pointed at a person because injection injuries require immediate medical attention.
Mistake 3: Using the Wrong Tip, Nozzle, Paint, or Pressure
The spray tip is not a decorative cap. It helps determine the fan width and the amount of coating delivered. A tip that is too small for a heavy material may clog or produce tails at the edges of the fan. A tip that is too large can release too much paint, making runs and excessive film thickness more likely.
Match the equipment to the coating
Lighter coatings such as stains, lacquers, and some enamels generally use smaller openings than heavier architectural coatings. Paint manufacturers frequently publish recommended tip ranges and pressure guidance in technical data sheets. The sprayer must also be capable of supporting the chosen tip. ng should never be an automatic ritual. Some products are formulated to spray without thinning, while others may permit a limited amount of water, conditioner, or an appropriate solvent. Adding too much thinner can reduce coverage, alter drying, increase runs, and affect the coating’s intended performance. Follow the coating label rather than a universal recipe found in the dusty corner of an online forum.
For an airless sprayer, begin with pressure low and increase it only until the tails disappear and the fan becomes uniform. More pressure is not automatically better. Excess pressure can increase overspray and accelerate tip wear without improving the finish. before touching the project
Strain the paint when recommended, prime the system, and test the spray pattern on cardboard or scrap material. Look for an even fan with no heavy center, weak gaps, pulsing, or pronounced lines along the edges.
If the pattern is poor, change one variable at a time. Adjust pressure, airflow, material flow, viscosity, or tip selection according to the equipment instructions. Randomly turning every control is the paint-sprayer equivalent of pressing all the elevator buttons because you are in a hurry.
Mistake 4: Spraying at the Wrong Distance or Angle
Even perfectly prepared paint will look uneven when the gun constantly moves closer to and farther from the surface. Spraying too close concentrates material in a narrow area and encourages runs. Spraying too far away creates a wider, drier pattern, wastes paint, and may leave a rough or dusty texture.
Keep the gun square to the surface
The correct working distance varies by sprayer, tip, and coating. Many handheld HVLP instructions suggest a distance around 6 to 8 inches, while common airless techniques often place the tip approximately 12 inches from the surface. The equipment manual remains the final authority. he gun perpendicular to the work. Move your entire arm parallel to the surface instead of pivoting your wrist. Wrist pivoting creates an arc: the gun is close in the center of the stroke and farther away at both ends. The result is a heavy middle with weak edges.
On wide walls, maintain a comfortable working zone rather than reaching too far. Reposition your body, ladder, or platform as needed. A strained painter rarely maintains a consistent distance, and no one has ever improved a spray pattern by leaning sideways like a confused flamingo.
Trigger at the right moment
Begin moving the gun before pulling the trigger. Release the trigger before stopping the stroke. This prevents blobs of paint from building up where each pass begins and ends. Keep the movement smooth and use the test surface to establish a pace that deposits an even wet coat without sagging.
Mistake 5: Moving Inconsistently and Ignoring Overlap
A spray fan is designed to work through controlled, repeatable passes. Moving too slowly applies too much material. Moving too quickly leaves thin coverage. Speeding up near obstacles and slowing down in open areas creates visible bands after drying.
Use steady passes with deliberate overlap
For many architectural spraying projects, manufacturers recommend overlapping adjacent passes by approximately 50 percent. In practical terms, aim the tip toward the edge or center region of the previous pass according to the fan pattern and equipment guidance. This distributes paint more evenly and reduces striping. n manageable sections while maintaining a wet edge. On walls and ceilings, spray perimeter areas and corners in an organized sequence before filling the broader sections. Avoid repeatedly spraying random thin spots while the surrounding paint is beginning to set; that can create uneven texture and sheen.
Orient the spray pattern to suit the direction of travel. A vertical fan generally works well when moving horizontally, while a horizontal fan suits vertical movement. The goal is to cover the surface efficiently without forcing a wide fan into a narrow detail.
Watch what the paint is doing
Do not stare only at the spray gun. Observe the wet coating under good lighting. A properly applied pass should look consistently wet without thick ridges, curtains, dry patches, or heavy edges.
If runs appear, first determine why. The gun may be too close, movement may be too slow, material flow may be excessive, or multiple passes may be stacking too much paint. Correcting the cause is more effective than continuing to spray and hoping the run becomes emotionally ready to leave.
Mistake 6: Applying Heavy Coats and Neglecting Cleanup
The desire to achieve full coverage in one pass causes many paint sprayer failures. Heavy coats can sag, wrinkle, crack, bubble, remain soft, or dry unevenly. The surface may skin over while material underneath remains wet.
Build the finish gradually
Several controlled coats are generally safer than one overloaded coat. Follow the paint manufacturer’s wet-film, dry-time, and recoat instructions. Temperature and humidity affect drying, so a recoat time printed for moderate laboratory conditions may need to be extended in cooler or more humid surroundings. confuse “dry to the touch” with fully cured. A surface may feel dry while remaining vulnerable to fingerprints, blocking, scratches, or impressions from hardware. Let cabinet doors, shelves, furniture, and trim cure as directed before putting them back into demanding service.
If a run develops, resist wiping it repeatedly while the coating becomes tacky. Depending on the product and severity, the cleaner repair may be to let it dry, sand the defect smooth, remove the dust, and apply another controlled coat.
Clean the sprayer immediately
Paint left inside a sprayer can dry in the tip, filter, gun, hose, pickup tube, or fluid passages. Even a small amount of residue can distort the next spray pattern. Empty and flush the system according to the manufacturer’s procedure, using the correct cleaning liquid for the coating.
Relieve pressure and engage the trigger lock before servicing an airless tip or gun. Never assume that switching off the motor removes pressure from the system. Clean filters, guards, nozzles, cups, and other removable components as directed, then store the equipment properly. p may feel like the boring final scene after the exciting spraying montage, but it protects the pump, prevents clogs, and saves considerable setup time on the next project.
A Reliable Paint Sprayer Workflow
- Confirm that the sprayer, tip, and coating are compatible.
- Read the paint label and sprayer manual completely.
- Clean, repair, sand, and prime the surface as needed.
- Mask a larger area than you think overspray can reach.
- Set up ventilation and wear appropriate protective equipment.
- Mix and strain the coating when directed.
- Test the fan pattern on cardboard or scrap material.
- Adjust pressure, airflow, and material flow gradually.
- Keep the gun square and at a consistent distance.
- Move before triggering and release before stopping.
- Overlap passes evenly while watching the wet edge.
- Apply controlled coats and respect recoat times.
- Relieve pressure and clean the equipment immediately.
Experience Notes: What Real Sprayer Projects Teach You
The first lesson from repeated paint sprayer projects is that spraying is often the fastest part of the job. Preparation, masking, equipment setup, testing, and cleanup take most of the time. Beginners sometimes become impatient because they rented a powerful machine and expected immediate transformation. Experienced users accept that a 15-minute spray session may require an hour of preparation. That hour is not wasted; it is what makes the 15 minutes successful.
One useful habit is to create a small testing station before every project. A large piece of cardboard allows you to confirm the fan shape, practice your trigger timing, and estimate the correct movement speed. The test should happen whenever you change paint, tips, pressure, or material-flow settings. It is far better to discover a clogged filter on cardboard than in the center of a freshly prepared cabinet door.
Lighting also matters more than many people expect. Under weak or flat lighting, a surface can appear evenly coated even when it contains dry areas and heavy bands. Position portable work lights so they shine across the surface at an angle. The reflected light makes changes in wetness and texture easier to see. Move the light or change your viewing position as the project progresses.
Another practical lesson is to plan your movement before pulling the trigger. Decide where each pass begins, where it ends, and how you will reposition your body. Move hoses and cords away from the wet area. On cabinet projects, arrange doors so you can reach every edge without leaning over freshly sprayed faces. On exterior work, identify natural stopping points such as corners, trim boards, or siding breaks.
Hoses deserve special attention. An airless hose can drag through dust, catch on a ladder, rub against a wet wall, or bump a freshly painted corner. Many experienced painters guide the hose with the free hand and periodically check its location. A perfect spray technique cannot rescue a finish after the hose performs an unscheduled interpretive dance across it.
It is also wise to keep a small troubleshooting kit nearby. Useful items may include clean water or the approved solvent, extra filters, a compatible spare tip, cleaning brushes, lint-free rags, a tip-cleaning container, stir sticks, strainers, and scrap cardboard. Having these supplies within reach makes it easier to correct a developing problem before paint begins drying inside the equipment.
Patience becomes especially important between coats. A finish may look ready because its surface is no longer shiny, yet the underlying film may still be soft. Spraying too soon can reactivate the first coat, increase sagging, or create wrinkles. Follow the product’s recoat window, and adjust expectations for humidity and temperature. When in doubt, giving the coating more time is usually less expensive than sanding an entire project.
Finally, stop periodically and inspect the work from several angles. Do not wait until the equipment has been cleaned and the masking removed. Check edges, corners, lower sections, and areas around details where spray speed often changes. Small defects are easier to correct while the project is still organized and the equipment is available.
The best paint sprayer experience does not come from moving as quickly as possible. It comes from developing a repeatable rhythm: prepare carefully, test deliberately, spray consistently, inspect frequently, and clean thoroughly. Once that rhythm becomes familiar, the sprayer stops feeling unpredictable and begins delivering the smooth, efficient finish that made you buy or rent it in the first place.
Conclusion
A flawless paint sprayer finish is not created by holding the trigger longer or turning the pressure to maximum. It comes from controlling the entire process.
Prepare the surface, protect the surrounding area, match the coating to the correct equipment, test the spray pattern, maintain a consistent distance, overlap each pass, and build coverage with controlled coats. Finish by cleaning the system before residue has time to harden.
A paint sprayer can save enormous amounts of application time, but it does not eliminate craftsmanship. It simply replaces brush technique with equipment setup, movement control, and careful planning. Avoid these six paint sprayer mistakes, and your finished surface is far more likely to look smooth, uniform, and professionally appliedwithout requiring an emergency purchase of strategically placed wall art.