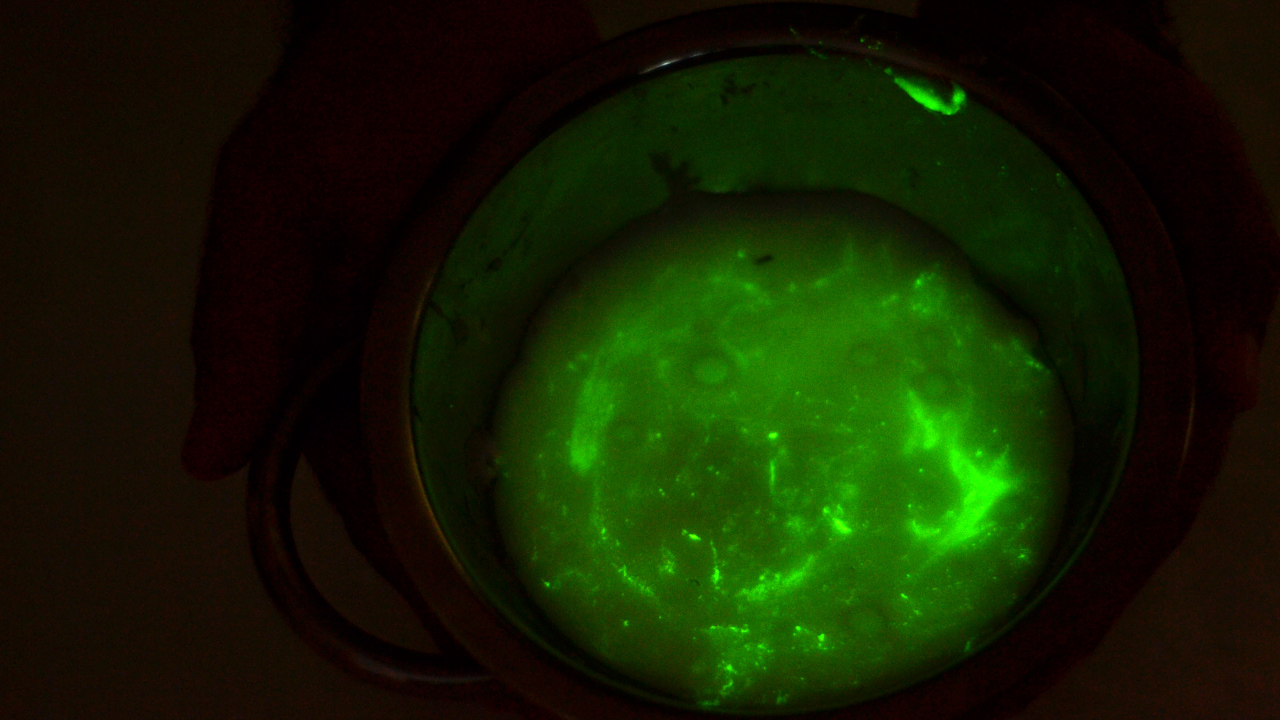
Glow in the dark slime is what happens when a science experiment walks into a craft room wearing a tiny neon cape. It stretches, squishes, jiggles, and thenbecause regular slime apparently was not dramatic enoughit glows when the lights go out. Whether you are planning a rainy-day activity, a Halloween party, a classroom STEM lesson, or simply trying to become the coolest adult within a ten-foot radius, learning how to make glow in the dark slime is a surprisingly easy win.
The best part? You do not need a laboratory, a white coat, or a suspiciously bubbling cauldron. Most glow slime recipes use simple ingredients such as school glue, baking soda, contact lens solution, glow paint, glow pigment, or glow in the dark glue. The magic comes from two things: a slime activator that turns glue into a stretchy polymer, and a glow material that absorbs light and releases it slowly in the dark.
Below are three reliable ways to make glow in the dark slime at home: a beginner-friendly glow glue slime, a bright clear-glue slime with glow pigment or paint, and a fluffy glow slime that feels like a marshmallow got promoted to toy status. Each method includes practical tips, safety notes, troubleshooting advice, and real-world examples so your slime glows beautifully instead of turning into a sad bowl of sticky soup.
Before You Start: Glow Slime Safety and Setup
Before the glow party begins, let’s talk safety. Homemade slime is fun, but it is not food, not lip gloss, and definitely not a midnight snack. Young kids should always make slime with adult supervision. Keep ingredients away from toddlers, pets, and anyone who thinks “Do not eat” is merely a suggestion.
Many slime recipes use contact lens solution as the activator. The important detail is that the contact solution usually needs to contain boric acid and/or sodium borate to help the slime form. These ingredients work in small amounts inside the recipe, but they should not be swallowed or handled carelessly. Avoid using slime on broken skin, wash hands before and after play, and toss slime if it smells strange, dries out, or collects mystery crumbs from the carpet kingdom.
Basic Supplies You Will Need
- Mixing bowls
- Measuring spoons
- Craft sticks or plastic spoons
- Airtight containers or zip-top bags
- Disposable table cover or washable tray
- Soap and water for cleanup
To get the strongest glow, charge your slime under bright light before playing with it in the dark. Sunlight works well, but a strong lamp can also help. Spread the slime flat while charging so more surface area absorbs light. Think of it like giving your slime a tiny solar-powered pep talk.
Method 1: Classic Glow in the Dark Slime With Glow Glue
This is the easiest way to make glow in the dark slime because the glow material is already mixed into the glue. It is a great choice for beginners, kids’ parties, classroom activities, and anyone who wants fewer ingredients and fewer chances to accidentally decorate the kitchen with fluorescent goo.
Ingredients
- 1 bottle glow in the dark school glue, about 5 ounces
- 1/2 tablespoon baking soda
- 1 tablespoon contact lens solution, plus more if needed
- Optional: 1 to 2 tablespoons water for stretchier slime
Instructions
- Pour the entire bottle of glow in the dark glue into a mixing bowl.
- Add the baking soda and stir until the mixture looks smooth.
- If you want softer, stretchier slime, mix in a little water.
- Add 1 tablespoon of contact lens solution and stir slowly.
- As the slime thickens, switch from stirring to kneading with your hands.
- If the slime is too sticky, add contact solution 1/4 teaspoon at a time.
- Charge the slime under bright light, then take it into a dark room and enjoy the glow.
Why This Method Works
School glue contains long polymer molecules. When you add the right activator, those molecules begin linking together, changing the mixture from runny glue into stretchy slime. Baking soda helps firm up the texture, while the contact lens solution provides the borate-based ingredient that activates the slime. The glow glue adds the visual effect without requiring extra pigment or paint.
Best For
This recipe is best for beginners because it has the fewest moving parts. It is also ideal if you want a clean, simple glow without worrying about measuring pigment. The texture is usually smooth, stretchy, and easy to store. If your slime feels stiff, knead in a few drops of water or lotion. If it feels too sticky, add a tiny amount of contact solution and knead again.
Method 2: Clear Glue Glow Slime With Glow Paint or Pigment
This version is perfect when you want a brighter, more customized glow. Clear glue creates a glassy slime base, while glow paint or glow powder lets you control the color and intensity. This method is excellent for galaxy slime, alien slime, Halloween slime, and anything that looks like it escaped from a friendly UFO.
Ingredients
- 1/2 cup clear school glue
- 1/4 to 1/2 teaspoon baking soda
- 1 tablespoon contact lens solution, plus more if needed
- 1 to 2 tablespoons water
- 1 teaspoon non-toxic glow in the dark paint or cosmetic-safe glow pigment
- Optional: fine glitter, star confetti, or neon food coloring
Instructions
- Add clear glue to a clean bowl.
- Mix in the water to loosen the glue slightly.
- Stir in glow paint or glow pigment until evenly blended.
- Add baking soda and mix until smooth.
- Add contact lens solution slowly while stirring.
- Once the slime begins pulling away from the bowl, knead it by hand.
- Add more activator only if the slime remains very sticky after kneading.
- Charge under bright light and test the glow in a dark space.
Tips for a Stronger Glow
Use a light hand with color. A few drops of neon food coloring can look great, but too much dye may block the glow effect. Clear glue slime usually looks best with pale green, blue, yellow, or aqua tones. If you are using glow powder, choose a product labeled non-toxic and appropriate for crafts. Do not use industrial glow powders or mystery powders from the back of a drawer labeled “probably fine.” Craft time should not require a detective.
For a galaxy effect, divide the slime into three small bowls before activating. Tint one blue, one purple, and one green. Add glow pigment to each bowl, activate them separately, then twist the colors together. Do not overmix unless your dream galaxy is “gray soup nebula.”
Best For
This method is best for crafters who want creative control. It gives you the most room to experiment with colors, glitter, glow strength, and theme. It is also a good option if you cannot find glow in the dark glue but can find non-toxic glow paint at a craft store.
Method 3: Fluffy Glow in the Dark Slime
Fluffy glow slime is soft, puffy, and extremely satisfying to poke. The secret ingredient is shaving cream, which adds air and volume. This slime does not stay fluffy forever, but while it lasts, it has the squish factor of a tiny glowing cloud. It is especially fun for sensory play, party favors, or Halloween “monster fluff.”
Ingredients
- 1/2 cup white school glue or glow in the dark glue
- 2 to 3 cups foam shaving cream
- 1/2 teaspoon baking soda
- 1 tablespoon contact lens solution, plus more if needed
- 1 teaspoon non-toxic glow paint, if using regular white glue
- Optional: lotion for softness
- Optional: neon food coloring
Instructions
- Add glue to a large bowl.
- If using regular glue, stir in glow paint until the color is even.
- Fold in shaving cream gently. The mixture should look fluffy and airy.
- Add baking soda and stir carefully.
- Add contact lens solution slowly, mixing between additions.
- When the slime starts forming, knead it with clean hands.
- Add a small amount of lotion if you want a softer stretch.
- Charge under bright light before playing in the dark.
Texture Notes
Fluffy slime can be stickier at first because shaving cream adds extra volume and moisture. Do not panic. Knead before adding more activator. Too much contact solution can make slime rubbery, and once slime becomes rubbery, it does not politely apologize and go back to being perfect. Add activator slowly, as if you are seasoning soupnot as if you are putting out a fire.
Best For
Fluffy glow slime is best when texture matters as much as glow. It is not always as transparent or bright as clear glue slime, but it feels fantastic. Use it for sensory bins, pretend moon rocks, monster slime, or a spooky party station where kids can mix their own glowing blobs.
How to Charge Glow in the Dark Slime
Glow materials work by absorbing light and releasing it slowly. To charge your slime, flatten it on a tray and place it under bright light for a few minutes. Sunlight is usually the strongest option, but a bright lamp can also work. After charging, move the slime to a dark room, closet, or bathroom with the lights off. The glow will fade gradually, but you can recharge it again and again.
If your slime barely glows, the issue may be weak lighting, too much food coloring, not enough glow material, or old glow paint. For better results, use fresh glow glue or paint, keep the slime color light, and charge it from multiple angles.
Troubleshooting Common Glow Slime Problems
My Slime Is Too Sticky
Knead it for several minutes first. If it still sticks badly, add contact solution a few drops at a time. Be patient. Slime often feels messy before it becomes smooth.
My Slime Is Too Hard
You may have added too much activator. Try kneading in a little lotion, warm water, or extra glue. Add slowly and work it in until the slime softens.
My Slime Does Not Glow Much
Charge it longer under brighter light. If you used food coloring, the color may be too dark. Next time, use less dye and more glow material.
My Slime Smells Weird
Throw it away. Slime is not a forever pet. Store fresh slime in an airtight container, and discard it after a few days to a couple of weeks depending on cleanliness, smell, and texture.
Creative Glow Slime Ideas
Once you master the basic recipes, you can turn glow slime into themed creations. Make “radioactive slime” with neon green glow glue. Create “moon slime” with silver glitter and pale blue glow pigment. Try “monster slime” with googly eyes for Halloween, or “galaxy slime” with purple, blue, and green clear slime twisted together. For a classroom lesson, ask kids to compare which slime glows longest: glow glue slime, paint slime, or pigment slime.
You can also turn the activity into a mini science experiment. Keep the recipe the same but change one variable, such as charging time, light source, glue type, or pigment amount. Record which batch glows brightest and which has the best stretch. Suddenly, slime becomes data. Very sticky data, but still data.
Experience Notes: What Making Glow in the Dark Slime Is Really Like
Making glow in the dark slime sounds simple, and it is, but the experience has a few funny little surprises. The first surprise is that slime rarely looks perfect in the bowl. At the beginning, it may seem too wet, too stringy, or too sticky. This is the stage where beginners often panic and pour in too much activator. The better move is to keep stirring and kneading. Slime changes texture as the ingredients fully combine, and sometimes it needs a minute to stop acting like glue with ambitions.
The second surprise is how much lighting matters. A batch that looks unimpressive in a bright room can suddenly look magical in a dark hallway after a good charge under sunlight. When testing glow slime, I have found that spreading it thin helps a lot. A thick ball of slime only charges well on the outside, but a flattened pancake shape gets more light across the surface. After a few minutes, you can roll it back up and get a much better glow.
The third lesson is that color can be both your friend and your enemy. Neon colors look amazing in daylight, but if you add too much dye, the slime may not glow as brightly. Pale green and yellow-green usually give the strongest classic glow. Blue glow slime can look cooler and more mysterious, but it may appear dimmer. Purple slime is beautiful, but it often needs extra glow pigment to shine well in the dark.
Texture also changes the experience. Classic glow glue slime is smooth and dependable, like the responsible older sibling of the slime family. Clear glue glow slime is prettier and more dramatic, especially with glitter, but it can show bubbles after mixing. Fluffy glow slime is the most fun to poke and squish, but it slowly loses puffiness as the shaving cream settles. That does not mean it fails; it simply becomes regular slime after its cloud era ends.
Storage makes a big difference, too. The best container is airtight and clean. If kids play with slime after snack time, the slime may collect crumbs, dust, and tiny unidentified objects that appear to be from another dimension. Washing hands before play keeps the slime cleaner and helps it last longer. I also recommend labeling containers by color or recipe, especially if you make several batches. Otherwise, you may open a container later and wonder whether you created “galaxy slime” or “forgotten swamp sample.”
The most satisfying part of the whole project is the lights-off reveal. Kids usually react as if the slime has developed superpowers. Adults do too, although we pretend to be calm because we pay taxes. The glow effect turns a simple craft into a memorable moment, and that is why glow in the dark slime remains such a popular DIY activity. It is hands-on, affordable, creative, and just messy enough to feel exciting without requiring a full home renovation afterward.
Conclusion
Glow in the dark slime is one of the easiest ways to combine craft time, sensory play, and beginner-friendly science. You can keep it simple with glow glue, customize it with clear glue and glow pigment, or make it extra squishy with fluffy slime ingredients. The key is to add activator slowly, charge the slime under bright light, and keep safety in mind from start to finish.
Whether you are making slime for a party, a classroom demonstration, or a weekend project, these three methods give you plenty of room to experiment. Start with the classic glow glue recipe if you are new, try the clear glue version when you want brighter colors, and make fluffy glow slime when you want maximum squish. Just remember: slime should glow in the dark, not live permanently under the couch.
Note: Adult supervision is recommended for all slime recipes. Do not eat slime or slime ingredients. Wash hands after play, avoid contact with eyes and broken skin, and discard slime if it becomes dirty, dry, or develops an unusual smell.